|
|||||||
| Home | Forum | Online Store | Information | LJ Webcam | Gallery | Register | FAQ | Community | Calendar | Today's Posts | Search |
|
|
Thread Tools | Display Modes |
 12-17-2012, 05:48 AM
|
#11 |
|
Junior
Join Date: Jan 2010
Location: Northern NJ
Posts: 4
|
Rolling Rack Project
OK, I've been shamelessly stealing some of these great ideas from some of you sharp West Coast guys. Time for me to try to contribute something.
Here's a rolling rack project that I did about three years ago and posted on a few other sites. Some changes that I've made since then: I made slings for all three bunks. I keep a Revo, Kaskazi DII and Ocean Kayak P-13 on this rack. All three kayaks are kept hull down in the slings. I know some folks advised hull up on the bunks, but I've never had a single issue with oil canning and it's much more convenient this way. Anyone hanging a kayak from a hoist would have a similar arrangement. The other boats are relegated to an A-frame rack on the side yard. Here's a day project that might help free up some floor space in the garage. Good for burning a snowy day! We have a single car garage and were constantly stumbling over both the kayaks. I didn't really want to store them outside; we live in NJ...I didn't want these kayaks boosted  I wanted a rack that could hold up to 3 kayaks, but be able to get them all out of the way if needed. I found some other similar designs on the web, but adapted some of the better features to make something that would work best for me. A trip to the Home Depot got me the wood, hardware and misc supplies needed. Overall outside dimensions are 72" x 39". The inside width dimensions were dictated by the fattest boat (OK Malibu 2XL). I wanted to be able to slide the kayaks onto the crosspieces or bunks, so I used black foam pipe insulation and covered them with indoor/outdoor carpet. I wrapped the carpet around the top and sides and secured it to the bottom of the 2x4's with staples all the way across. You'll need a staple gun for this.   The OK sits directly on the bunks. I don't really worry about creating permanent dents in the bottom of this boat. They're built like tanks and because of the bottom design, not likely to get damaged. I was a little more concerned about storing the Revo in the same fashion. I decided to create a sling. I bought some 4" wide winch strap material from online. I doubled over the material on the one side and screwed it to the 2x4 using fender washers and screws. You can easily poke holes in the material using a pencil soldering iron. On the other side I installed a d-ring and secured it using a small bolt, nut and lock washer. This side gets hung on the hooks. When I want to use the boat, I unhook both D-rings from the hooks, ease the boat onto the bunks, and slide the Revo out.  I used these corner brackets that I picked up at HD to secure all the cross piece bunks to the uprights and horizontal long pieces. They save a bunch of time and worked out pretty well.  I got some heavy duty rolling casters from Harbor Freight. I made sure that they had real ball bearings and could handle quite a bit of weight. I screwed in short pieces of 2x4's to the bottom so that I could get some long screws into the bottom to mount the wheels on. 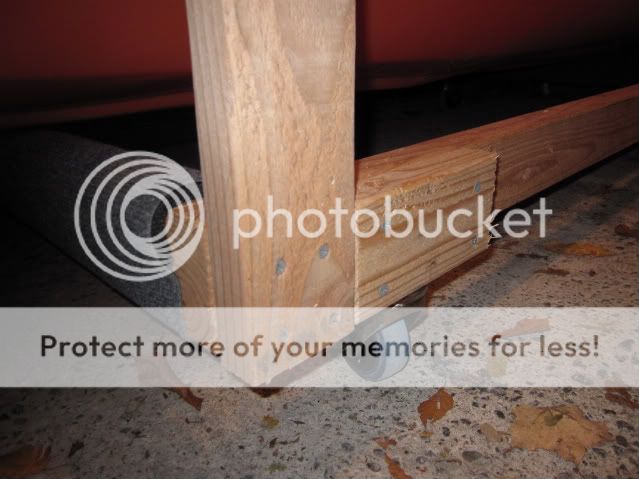 I've had the rack in use for several months and it's working out great for us. When I want to get something off the shelf in back of it, it's fairly easy to roll it out of the way. I can roll it right out into the driveway if I want to clean the garage. Make sure that you have some wheel chocks ready. You don't want to be chasing your rack and yaks down the driveway. Sorry for the varying size of the pictures. Couldn't for the life of me figure out how to get the first shot the same size as some of the others. |

|

|
| Tags |
| kayak fishing inovations, kayak rigging ideas |
|
|


 Threaded Mode