 |
|
|||||||
| Home | Forum | Online Store | Information | LJ Webcam | Gallery | Register | FAQ | Community | Calendar | Today's Posts | Search |
 |
|
|
Thread Tools | Display Modes |
|
|
#1 |
|
Danodog
Join Date: Sep 2012
Location: Lakeside, CA
Posts: 155
|
Beginning to accessorize the 2012 X-Factor
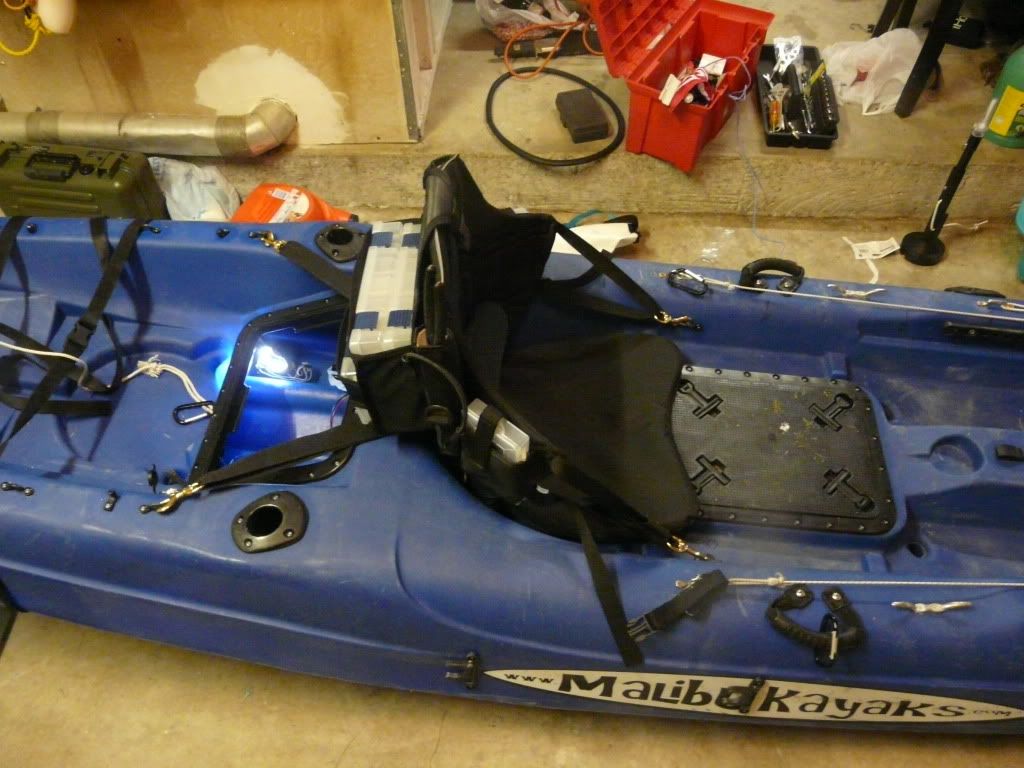
 With that being said, I am itching to get this yak on the water. With that being said, I am itching to get this yak on the water.A couple of questions first. Anyone in the plastic navy using the Gone Fishin Kayak seats? I want a nice padded and functional seat with storage and this seems to fit the bill. I am torn between the GTS Expedition and the Gone Fishin Kayak Seat. It seems like I might be able to ditch the milk crate if I get the Gone fishin Seat. Anyone using the The Fisherman PFD from Stohlquist? Again, I am torn between this seat and the Kokatat Bahia Tour Fishing Life Vest. I am a larger guy and I know that the Kokatat vest would fit me. Just not sure about the Stohlquist. Here is what I have decided so far. I am going to purchase the Lowrance Mark-4 Sonar/GPS Combo from OEX and let them install the device since I don't want to intentionally put holes in my Yak. I am also going to pay OEX to convert the new battery storage compartment to a live bait tank. Ordered a full sized white milk crate in white to match the yak. Going to buy Aqua Bound Sting Ray Fiberglass at OEX. Beside the nick/nack stuff, do you have any other recommendations? Thanks in advance. Danodog |
|
|

|
|
|
#2 |
|
Senior Member
Join Date: Jul 2007
Location: Waiting to launch
Posts: 1,381
|
Non nic nak stuff
Radio
Whistle- required Net greater than 18" opening- required Good set of wheels to move kayak Proper clothing to keep dry and sun protected |
|
|

|
|
|
#3 |
|
Senior Member
Join Date: Feb 2011
Location: Wrightwood
Posts: 623
|
I use the Stohlquist Fisherman PFD, I bought the size Universal Plus and it adjusts so far out I don't think it would be an issue. OEX is a retailer and they probably have it in stock, go try it on its a great vest. I don't see anything wrong with the Kokatat Bahia either get what you like.
The seats you are comparing I strongly recommend the GTS Expedition, you cant get a much more comfy seat. I haven't heard of the gone fishin seat, it looks like they focused on storage and not comfort (the seat pad looks uncomfortable). I cannot stress enough the importance of a good seat and a good paddle. You can cut corners in other areas but comfort and adequate propulsion will keep you on the water longer and you will have a much more enjoyable day. 
|
|
|

|
|
|
#4 |
|
Danodog
Join Date: Sep 2012
Location: Lakeside, CA
Posts: 155
|
Thanks for the information. Hopefully my sales will be complete tomorrow and I should have a good chunk of change to buy what I need to get on the water.
|
|
|

|
|
|
#5 |
|
Senior Member
Join Date: Mar 2006
Location: La Jolla Shores
Posts: 1,626
|
Fishing rods,reels to match, a few hooks,some leader material,sinkers,and maybe a gaff.......
|
|
|

|
|
|
#6 |
|
Senior Member
Join Date: Apr 2010
Location: garden grove
Posts: 308
|
As mentioned a good seat and paddle is a must.you don't want to cut corners on these items if you plan on spending alot of time on the water.i had the seirssports angler seat on my xfactor and could go all day in comfort.i had a cheap stock cobra paddle but upgraded to the warner camano paddle and what a difference those two things made.you'll pay more but if you get into the sport you'll end up upgrading anyways
|
|
|

|
|
|
#7 |
|
Large Member
Join Date: Jul 2012
Location: La Verne, CA
Posts: 1,005
|
Some people claim that getting stickers made of their moniker and putting it all over their kayak was the best money they spent
|
|
|

|
|
|
#8 |
|
Senior Member
Join Date: Nov 2012
Location: Vista
Posts: 411
|
Danodog, make some accessories with your woodworking gear! That's what I did. Get some of the T-track from Rockler and you can make your own repositionable and adjustable setups. Let's get together and do some woodworking too!
|
|
|

|
|
|
#9 |
|
Danodog
Join Date: Sep 2012
Location: Lakeside, CA
Posts: 155
|
Thanks all, for the help. Seeing this list is a little overwhelming. I figured I would have about $1200 from my Craigslist sales and I would have enough to convert my 2012 X-Factor blem to a freakin battleship. I want to support OEX as much as I can. Keep it local is my motto. I hope I get the money I am expecting in this last craigslist sale. If not, I may have to hold off on the fish finder or bait tank conversion until funds come in.
PFD - Kokatat Bahia Tour Mango XXL - $119 (read note below.) Paddle - OEX Aqua Bound Manta Ray Fiberglass - $115 Seat - Gone Fishin Kayak Seat - $127 Fish Finder - OEX Lowrance Mark-4 Sonar/GPS Combo - $224 VHF Radio -Standard Horizon HX280 5 - watt Submersible Handheld VHF Transceiver - $102 Convert Bait tank on 2012 X-Factor? OEX Not sure on price yet. Plan on using the battery storage compartment. Heavy duty Wheel Cart - OEX $129.00 (Stohquist goes to 54" chest which cuts it close. I will try one on at OEX though just to make sure.) Just with the above listed items my subtotal is around $816. I will also need a battery to power the fish finder and bait tank. I see a few hoop nets in my future, gaff, bed extender for truck and a couple of salt water setups for BTB. I was hoping to have a couple hundred left over to give to the wife as a peace offering.....that may not happen.  To think that a $450 blem kayak started this mess....hahaha. I guess I found the addiction. Danodog |
|
|

|
|
|
#10 | |
|
#1 on fishstick's hitlist
Join Date: May 2011
Location: Sea level
Posts: 1,478
|
Quote:
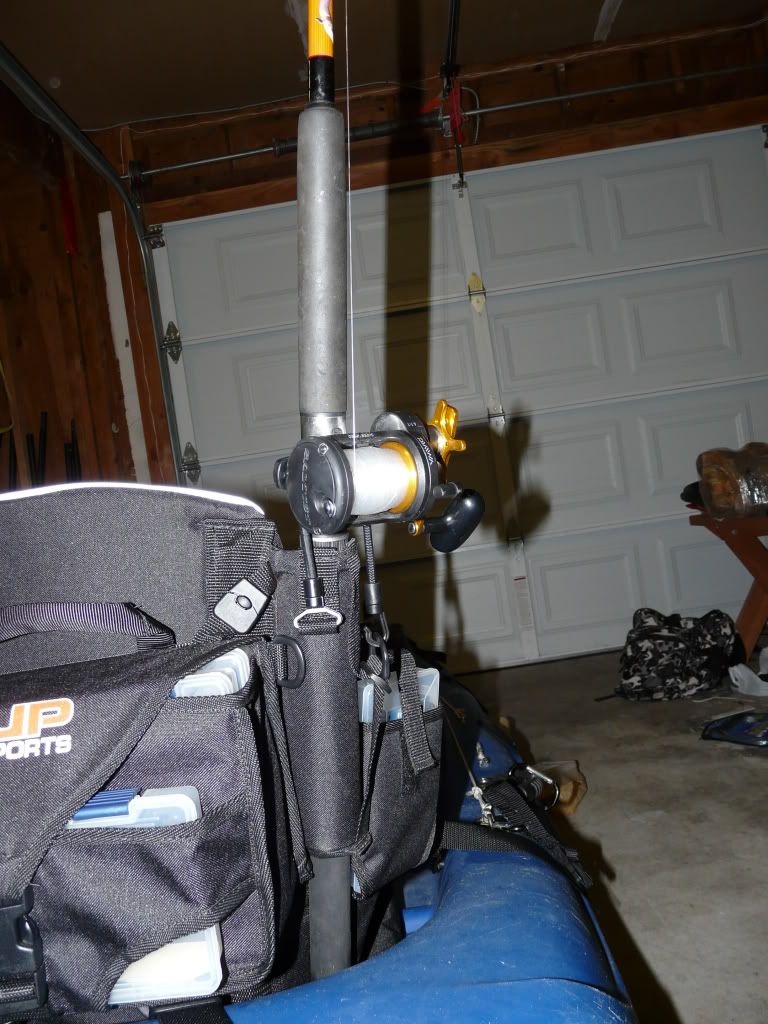
the seat is a must. i had the UP version. it held everything i needed plus some.    talk to Icelogger about his FF and bait tank set up.
__________________
MLPA- My Largest Poaching Area 
|
|
|
|

|
|
|
#11 | |
|
Danodog
Join Date: Sep 2012
Location: Lakeside, CA
Posts: 155
|
Quote:
But I am selling most of my woodworking tools. I need to get my yak on the water.  Maybe we can kick ideas out on the water. Maybe we can kick ideas out on the water.
|
|
|
|

|
|
|
#12 |
|
Member
Join Date: Aug 2012
Location: El Cajon
Posts: 45
|
If you're handy at all you can save about a hundred bucks by making your own kayak cart. I built one for my X-Factor for about $25-30. I got all the parts at Harbor Freight and Home Depot. If you're interested i'd be glad to snap some pics of it and tell you how i put it together. It's not as pretty as the one from OEX but it's cheap and it works.
|
|
|

|
|
|
#13 |
|
Senior Member
Join Date: Nov 2012
Location: Vista
Posts: 411
|
Dano
I welded up a cart that fits in my scupper holes for my yak and my moms. You can definitely make your own bait tank to save some cash. Use your woodworking tools to make all your own stuff to seriously have a CUSTOM yak! Get after it man |
|
|

|
|
|
#14 | |
|
Danodog
Join Date: Sep 2012
Location: Lakeside, CA
Posts: 155
|
Quote:
Hey RGB, do tell! I would love to see some photos. I am beginning to see that the DIY approach can make the dollar stretch a little further. Thanks! JarrodMC, Too late as I sold the majority of my wood working stuff today. There are no excuses now. I just need to give OEX a call and schedule an appointment. Too scared to drill holes in my kayak. I hope to have this yak ready to go in the next week or so. I think I will make a try at building a kayak cart. I am sure that I will tinker over time. I just want to soak it all in before hacking the yak. |
|
|
|

|
|
|
#15 |
|
Member
Join Date: Aug 2012
Location: El Cajon
Posts: 45
|
Okay as requested:
Materials Needed:
*Home Depot* (4) 3/4" PVC Tees (2) 3/4" PVC Cross Fittings (4) 3/4" PVC Caps About 6-8 Feet of 3/4" PVC Pipe 1 Section of 3/4" Pipe Insulation Zip Ties PVC Glue (1) 5/8" Threaded Rod (you will need about 2 feet) Make sure that the rod you get fits in the wheels from Harbor Freight, pretty sure it was 5/8". (4) 5/8" Nuts (2) 5/8" Flat Washers (2) 5/8" Split Washers *Look for a "Create-A-Bolt" package that will have the nuts and washers if you don't want to buy them separate. (2) Wire Clips to secure wheels *Harbor Freight* (2) Pneumatic Wheels Here's what it looks like finished: Start off by measuring the scuppers you want to use. Mine were 9 1/2" on center. Next, cut 2 pieces of pvc (A) long enough so that when you put the tees on (B & C) they measure 9 1/2" (or whatever you got) on center. Attach the tees to the pvc sections like above. You will have to cut two small sections of pvc to connect the tees (B & C) together. Once these are all test fitted go ahead and glue everything. Next put the threaded rod through the bottom section and attach the hardware in the order above. The inside nuts will get pulled into the tee as you tighten them down. Leave enough of the rod sticking out to put the wheel on and have enough room to drill a hole for the clip. Measure how much rod sticks out from the tee and cut the other side to match. Once the rod is cut to length and all the hardware is tightened down, put the wheels on and make a mark where you need to drill the holes for the pins. Remove the wheels and drill. Next, make the two t shaped uprights that fit into the scuppers. Glue all 4 sides to the cross fittings (D) but don't glue the t shaped pieces to the bottom. This allows the uprights to be removed for storage. Glue the caps (E) to the horizontal arms of the t shaped pieces. Take some sandpaper and round off the tops of the upright pieces (F) so they will slip into the scuppers easier. Cut sections of pipe insulation and place them as pictured. Zip-tie in place. As you can see, the whole thing breaks down small enough to fit in most hatches. The only thing i might suggest adding would be a "kickstand" so that it's easier to get it under your yak. This could be done by adding another tee in the middle of the bottom and inserting a length of pvc to prop it up while you lift the yak onto it. The horizontal pieces take most of the weight and prevent the cart from tipping and putting too much pressure on the scupper holes. Here's a few closeups: Hope this helps and saves you a few bucks, let me know if you have any questions. |
|
|

|
|
|
#16 | |
|
The Kayak Peddler
Join Date: Aug 2012
Location: North Hollywood
Posts: 591
|
Quote:
__________________
Keep your rod close, your gaff closer, and your paddle on a leash. |
|
|
|

|
|
|
#17 |
|
Senior Member
Join Date: Apr 2011
Location: Riverside CA
Posts: 673
|
Let me know how much it cost to get the bait tank installed/converted by oex. I'm in the same boat as you, have all the parts but afraid of drilling big holes just to find out I messed up somehow. Little hole for mounting stuff is one thing but holes bigger than an inch for bait tank plumbing. Yea....
|
|
|

|
|
|
#18 | |
|
Danodog
Join Date: Sep 2012
Location: Lakeside, CA
Posts: 155
|
Quote:
|
|
|
|

|
|
|
#19 |
|
Danodog
Join Date: Sep 2012
Location: Lakeside, CA
Posts: 155
|
I have no clue what a nice paddle would cost. I seen some paddles as high as $400 and others as low as $49. I was hoping to spend around $100 from the offerings at OEX. What is the minimum paddle that you would recommend? Thanks in advance.
|
|
|

|
|
|
#20 | |
|
Danodog
Join Date: Sep 2012
Location: Lakeside, CA
Posts: 155
|
Quote:
|
|
|
|

|
 |
|
|