
 |
|
|||||||
| Home | Forum | Online Store | Information | LJ Webcam | Gallery | Register | FAQ | Community | Calendar | Today's Posts | Search |
 |
|
|
Thread Tools | Display Modes |
|
|
#121 |
|
CEO of Team Roby
Join Date: Sep 2010
Posts: 905
|
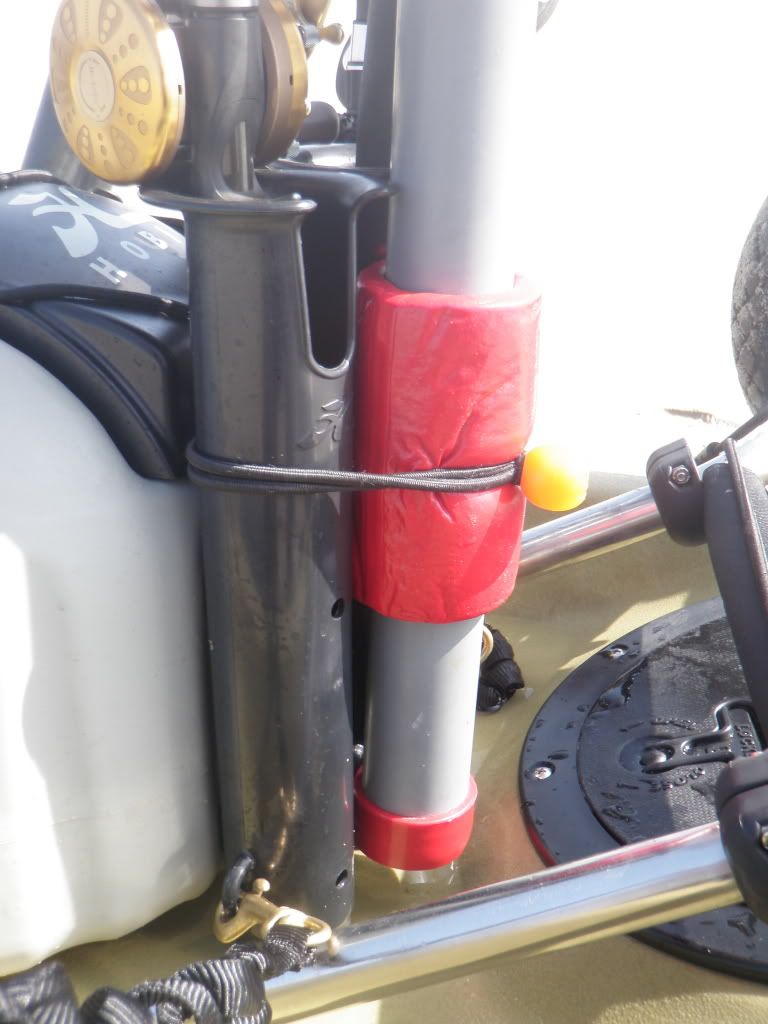 I can now use the screw-in pad eye to leash two items. 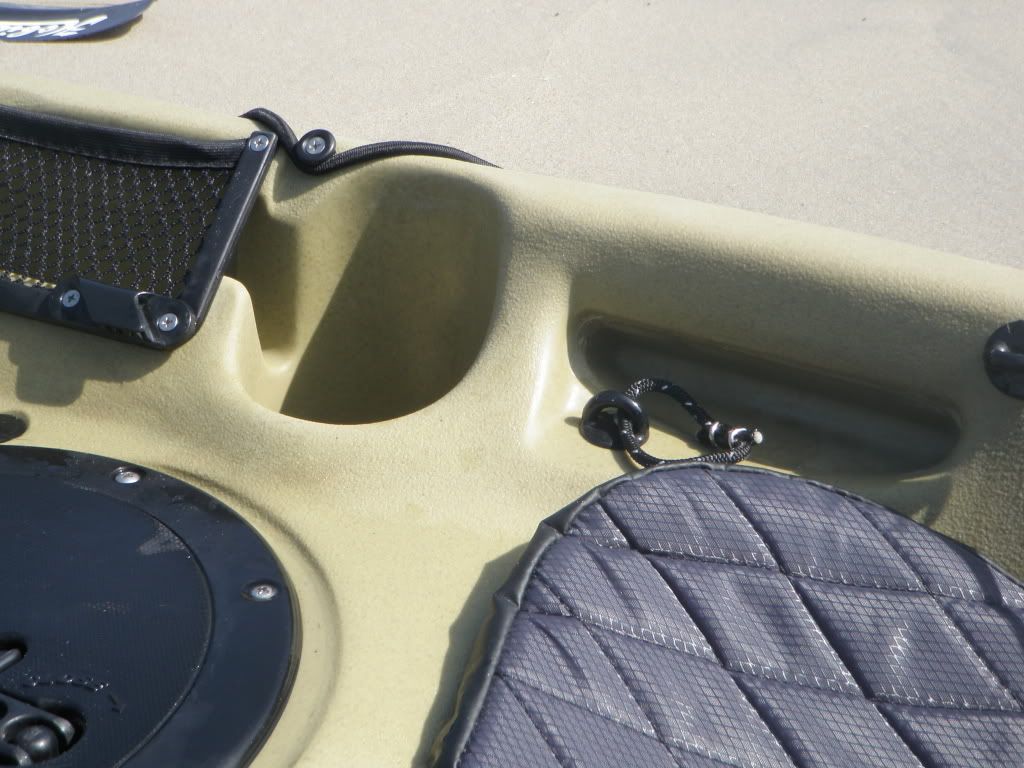 I use a mesh bag to keep my tackle in when I have the bait tank on the kayak. Fastlane put foam in my yak and it made a barrier around the inside of the hull just above the 8 inch hatch. The mesh bag stays put when I'm on the yak; it doesn't slide around. 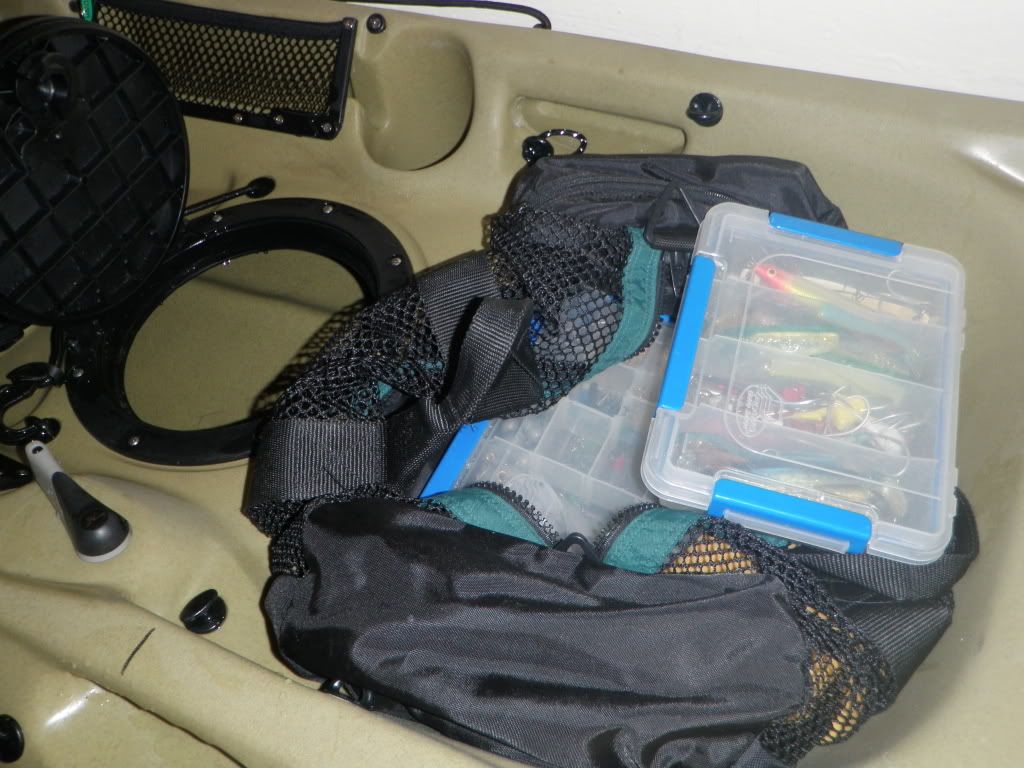
|
|
|

|
|
|
#122 |
|
Olivenhain Bob
Join Date: May 2008
Location: Olivenhain, CA
Posts: 1,121
|
Hobie Cup Holder Fix
OK class, raise your hands if this has ever happened to you. After a long day of peddling your yak back and forth in a fruitless search, you decide to call it a day and treat yourself to an ice cold beer in celebration of some beautiful time on the water. You pop the cap and set the bottle in the little hull indentation that Hobie calls a cup holder. It's time to head in but always hopeful, you pin one last greenie on and point your bow toward the launch.
All of a sudden it happens. You hook up. Fish on! The kayak rocks back and forth as your fish puts up an epic fight. Eventually, you win the battle. You land the fish, strap it down and smile. It has been a satisfying day. Time to get back to that beer. You look toward the empty cup holder and then, sadly, spot your empty bottle rolling around the bottom of the kayak. Bummer. I see hands in the air from just about every Hobie driver. Oh look, there are even a few of the paddle guys with their hands up. Well, I have good news. It does not have to be this way. For about $1.50 and a couple minutes work, you can turn that useless dent in your hull into a functional cup holder. All you need is a 3" PVC pipe connector and a piece of Velcro. Clean the pipe connector and the place on your yak where you want to attach the Velcro with some alcohol . Mate the pieces of Velcro together and attach one side to the pipe connector. Peel the tape off the other side of the Velcro and carefully press it in place at the desired location and you are done. Cup-holder-close.gif Cup-holder-with-beer.gif Sometimes the best ideas are really simple ones. Bob |
|
|

|
|
|
#123 |
|
Senior Member
Join Date: Feb 2010
Location: Clairemont
Posts: 813
|
|
|
|

|
|
|
#124 |
|
Senior Member
Join Date: Jun 2010
Location: Under a bridge
Posts: 2,169
|
Solution 1: Drink your beer faster.
 Solution 2: Learn how to hold your rod and reel in a 40lb YT at the same time, with ONE hand! 
|
|
|

|
|
|
#125 |
|
Senior Member
Join Date: Apr 2010
Posts: 6,856
|
I had trouble reaching the unit the old way and usually didn't need to but now that I have a GPS I'll need to be able to get the the buttons more often to mark waypoints. The RAM moved the entire unit roughly 8" - 9", should also make it easier on my back.
OLD FART  NEW FART  |
|
|

|
|
|
#126 |
|
Member
Join Date: Aug 2010
Posts: 64
|
Grease Mounting Transducer
H-Bird's Answer to What Type of Grease for Transducer Grease Mount
In additon to Humminbird's video for installation of their Kayk Kir using a grease mount you can go to http://www.yakhawaii.com/index.php?o...ging&Itemid=62 for another video. But for DIY, according to that link, H-bird support stated that "marine grease" or "axle grease" could be used. Has to resist heat (and preferably is not stinky!). The viscosity of the grease will help hold the transducer in place as will a very snug foam cutout if you DIY. I plan to make my own foam holder with a grease mount as soon as I recieve my new H-bird FF. Maybe someone can post a "brand" of grease that has worked well. I was told by H-bird that the only difference between a transom mount transducer (which is often stock with a FF package) and an in-hull mount transducer when mounted in-hull is that the transom mount tranducer may not read temperatures well. Maybe that is because of the location of the temp sensor inside the puck is different than inside the transom mount transducer? |
|
|

|
|
|
#127 |
|
"Floater"
Join Date: Sep 2010
Location: so cal
Posts: 164
|
Hobie battery box
I decided to engineer a new box for my outback for the rear 8" hatch since it doesn't get used for anything else. I was using the dry bag method up to now.
All that's needed is a CNC router, Hand held router, table saw, 1/2" and 1/4" ABS plastic, ABS glue and some basic dimensions. Directions; For the rounded part; Program the router using master cam, load drawing into CNC machine operating software. Adhere the 1/2" sheet of ABS to the router. Push the go button. Wait a couple minutes, remove plastic from router. (The round hole in the top serves two purposes; one is to route the power cable, the other is a finger hole to lift it out.) Cut squared pieces to proper dimensions using the table saw. Glue it all together with ABS glue. Let sit for 24 hours to cure. Use the hand router to round off the top edge of the box. The box should fit any Hobie with 8" round hatches. The battery I use is a 12 volt, 14AH. Slightly larger than typical but I can run my FF/GPS for about 3 days without a charge if necessary. If you use a typical battery with the box I made, you can put your keys and wallet in it too. Last edited by Kaijuu; 03-22-2011 at 08:01 AM. |
|
|

|
|
|
#128 |
|
Team Keine Zugehörigkeit
Join Date: Nov 2010
Location: Way out there
Posts: 2,854
|
Hay Kaijuu, being that not everyone here has MC and a CNC or those that do only cut metal, would you consider selling a box or two?
__________________
 Não alimente os trolls------------Don't feed the trolls---------------インタネット荒らしを無視しろ 
|
|
|

|
|
|
#129 |
|
"Floater"
Join Date: Sep 2010
Location: so cal
Posts: 164
|
a box or two
I suppose anything is possible. You should probably check it out first.
Variations are also manageable in most any material. For the Yak, plastic rules; It doesn't oxidize. Any other ideas that need a build, let me know. I live in Vista but go to Oceanside most days unless rain. I can bring it with me. P.S. We can also design and build your CNC router, then you wont need me to build a box. P.S.S. this box can be made using hand tools. A table saw, router, jig saw and a drill. Last edited by Kaijuu; 03-22-2011 at 08:03 AM. |
|
|

|
|
|
#130 |
|
Team Keine Zugehörigkeit
Join Date: Nov 2010
Location: Way out there
Posts: 2,854
|
I have access to all the necessary tooling and machines, but our least expensive CNC runs at $11.00 per minute, yes I typed PER MINUTE. the boss might go ape ca-ca
 if I tossed a G job on the floor. if I tossed a G job on the floor.Pm me what you have to offer as far as a router. I have been looking at the Taig Micro mill for some time now but just cant pull the trigger.
__________________
 Não alimente os trolls------------Don't feed the trolls---------------インタネット荒らしを無視しろ 
Last edited by bus kid; 03-22-2011 at 09:51 AM. Reason: typo correction |
|
|

|
|
|
#132 |
|
"Floater"
Join Date: Sep 2010
Location: so cal
Posts: 164
|
best to call.
Its best just to PM me. Keith
Last edited by Kaijuu; 03-22-2011 at 07:34 PM. |
|
|

|
|
|
#133 |
|
Currently @ MLO Territory
Join Date: Dec 2010
Location: Under the Shadow
Posts: 2,290
|
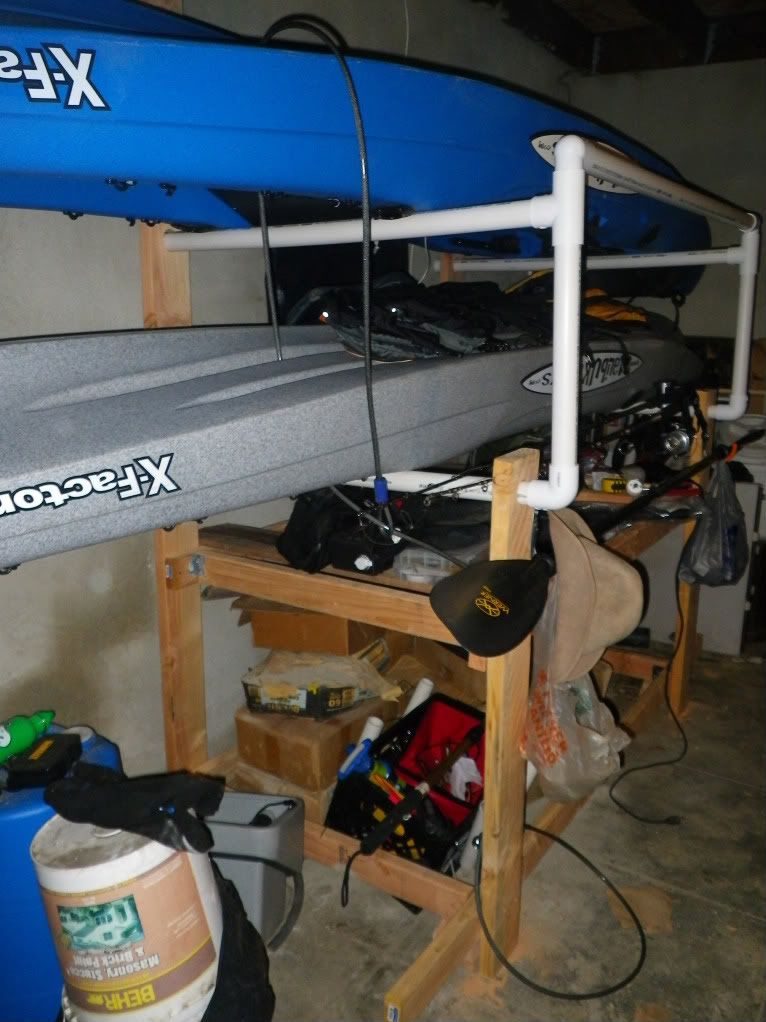
Well after i got tired of seeing all my junk all over the garage, i sat down and doodle some possible way i can store my kayak in the garage. I only could mount the kayak straight on from a perpendicular point since i have one side of the garage for my kayaks to fit. I decided to make a wood frame and use PVC as my rack holders. The first bottom portion is to store all the other junk you have in your garage the second layers is for your fishing bag, batteries then comes the PVC. The top PVC come loose to remove the bottom kayak.
 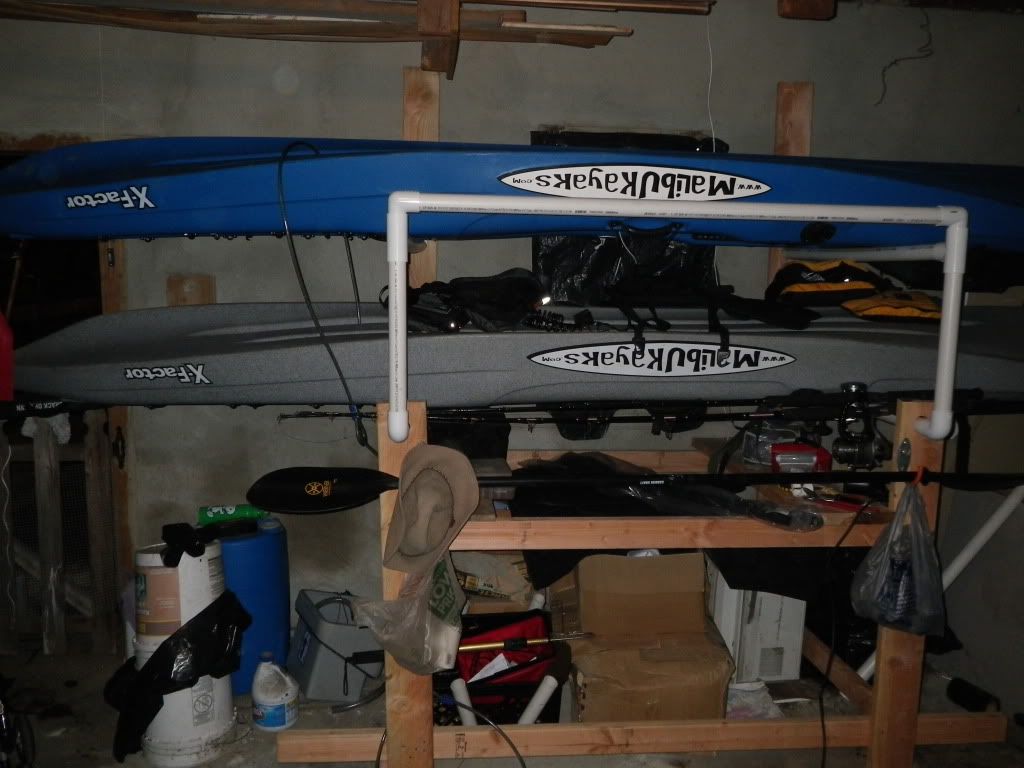 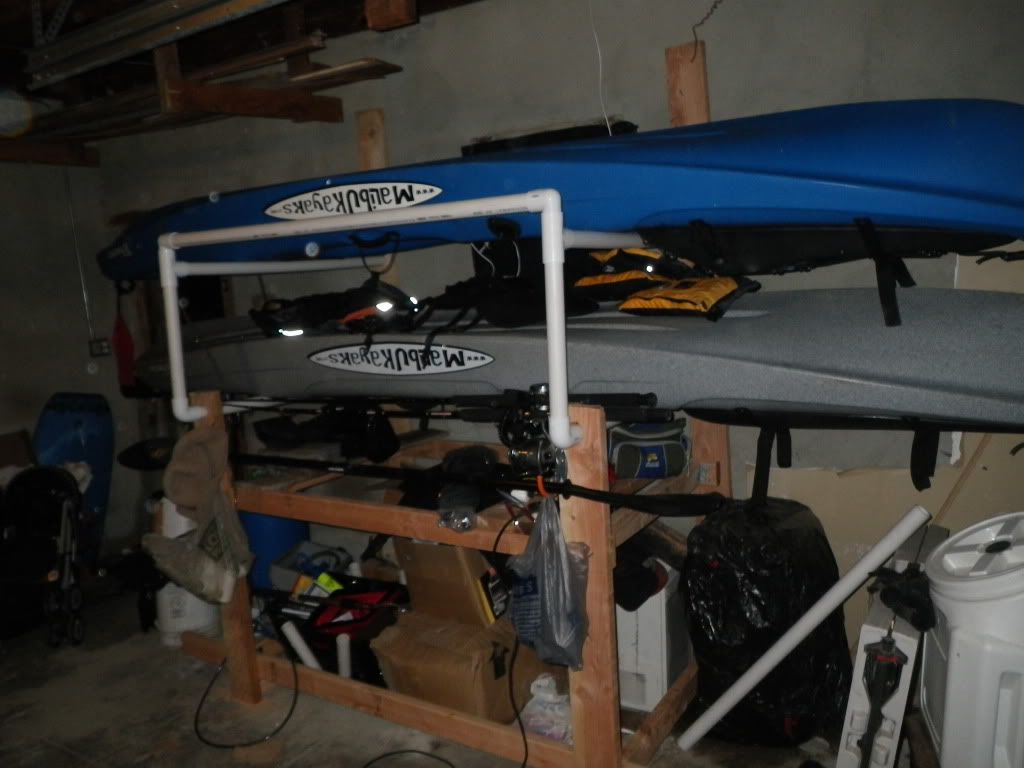 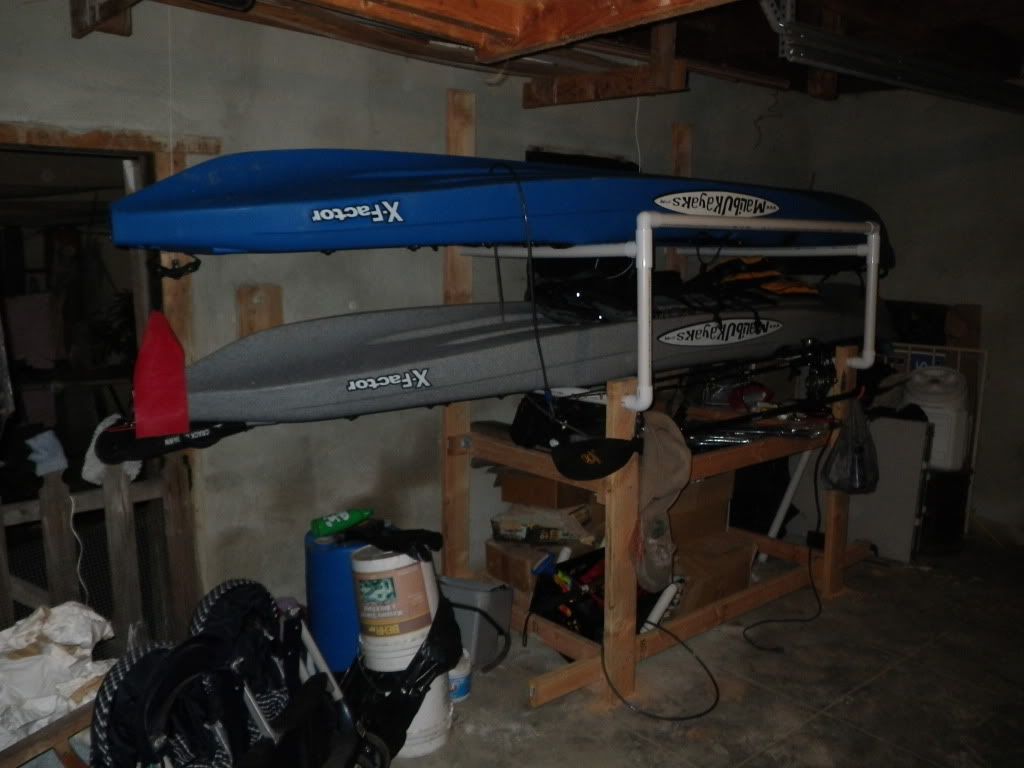
|
|
|

|
|
|
#134 | |
|
Senior Member
Join Date: Mar 2010
Location: San Diego
Posts: 2,385
|
Quote:
__________________
No better time than being on the water, God Bless, JimmyZ 
|
|
|
|

|
|
|
#135 |
|
"Floater"
Join Date: Sep 2010
Location: so cal
Posts: 164
|
Battery Box Storage / Tackle box update
I've been playing around with the idea of the original battery box. I have since made someone a larger box for his Revos' rear hatch to store both his FF and Live well batteries.
Today I decided to work the large box into a storage/tackle box to fit the middle hatch of my Outback. It's close to 7" deep with a tray that slips inside and sits at the top. The tray slips in and out easily. Figured I would put small terminal tackle in the tray and the larger stuff inside the larger compartment at the lower end. Still working things out. I guess now I'll have to do the Sea trials. One thing I'm unsure of is if the ABS is going to react with my plastic swim-baits. I remember the old plastic worms would melt some of the plastics used in tackle boxes and trays. Last edited by Kaijuu; 03-28-2011 at 04:20 PM. |
|
|

|
|
|
#136 |
|
.......
Join Date: Jan 2009
Posts: 1,509
|
My kayak Hoopnet
I originally posted this in back in 2006 on another board, but I was going through some archives, and found it again so I thought I'd re-post it here.
So....Here it is...my kayak hoopnet....  The nets one of my designs: essentually a redesign of this net I made in 2005 using the same netting:  It was a "working" prototype that I'd been playing with for while, but I had some issues with it. The first net had too big of an opening which produced too much drag in the water. Th newer one has the same size opening as a Danielson cone but the top ring is an inch and a half higher, and the base is only 28 inches across vrs 34 inches on the Danielson net and 36 inches on the Promar net. Since the base is smaller it has a lot less drag coming up through the water. It pulls easier and faster then either the Promar or the Danielson net. Like the Promar cone, my net folds down for flat storage.  I don't know how theirs work as I never owned one but my design has three pieces of pivoting 1/2 inch tubing that that turn on the 1/4 inch stainless hoop ring. The bridle is made from three lengths of 250 pound Mono leader. It runs down through the tube legs and it's tied to the Bottom 3/8 hoop. Basically to get the hoop to stand up and pull into shape you just have to pull up on the bridle.   Once it's up you just have to make sure the knots go up into the legs and it's ready to use.   I've pretty much got this one worked out. It's a great net. It sinks like a stone, pulls easy as Promars original smaller flat nets, and catches more bugs then they do. From playing around I've pretty much figured out that the crucial distance in a cone net is not the diameter but the entrance or top rings distance and height ratio to the bug. Most bugs are lost one of two ways in a basket style net. Either the bug flips over the ring before it gets high enough to block his initial jump or climbs out on the way up. So the advantage of larger Basket style net compared to a smaller one is the ring edge is simply further from the bug at the start of the pull. Conical nets do not have the same constraints With a conical net the top ring is already above the bug: the idea being it is it's high enough to make it hard for the bug to intially flip out. It's all about exit angle. When the exit angle is too steep for the bug to make on his first flip he undershoots the exit and ends up stuck backwards against the net wall or downward facing side. If he keeps flipping he just drives himself deeper into the net. The crucial distance is then not base diameter on a conical net but the entrance ring distance and height ratio to the bug. I can't figure out why the net manufacturer's have not figured that out but even the new Promars are much larger at the base which makes them harder to pull. Here's the old style cone geometry compared to my new net:  The larger the top ring diameter or the lower the ring, the better the angle is for swimming out. So the trick is to have a relatively small opening high enough above the bugs head that he can't make the angle when he tries to kick out. I've not used the Promars cones at all but I have a few Danielson conical nets. The D cones are made like traps. I think the guys who designed them thought that lobsters would climb in, feed, then not be able to find their way out. I don't believe that at all..... . Crabs...maybe.... but not lobsters. I've watched bugs feed in my Danielson nets with my IR Infrared camera and once they feed they get out fast. The Danielson nets work great but my three gripes are..... One: I think the top ring is too low and that bigger bugs sit on top and feed without getting in the net . Two: they hard to pull because they are too big and too heavy. Three they take up a lot of room in a boat and are impossible to carry on a kayak. The plus side you don't have to pull them that fast because once you have a bug in them it's very hard for them to get out. I have not used the larger Promars but I can tell just by looking they are an improvement in two ways. One the top ring is too high for bugs to perch on and feed and two: they fold for storage. Still they are huge, heavy and I bet they are a biiiiittttch to pull.  One thing for certain: Now that Promars come out with a two cone nets and the DFG has OKd them there is no doubt that cone nets are here to stay.  Cones are ideal for kayak because it's hard to pull as fast when your sitting down. Unfortunately the current ones commercially available are probably a little harder to pull then they need to be. Here's one more pic a standard D cone on top of my cone.  You don't have to be a rocket scientist to figure out why mine pulls easier, and with it's higher ring it should catch more and larger bugs. I have no plans to market these nets right now but they could be marketed. I think it's pretty much the ideal net for Kayaking. Seems to work so far for me:  ...and your welcome to make your own. Tight lines, Jim Last edited by Fiskadoro; 03-29-2011 at 06:03 AM. |
|
|

|
|
|
#137 |
|
Senior Member
Join Date: Feb 2009
Location: SAN DIEGO
Posts: 1,086
|
Hey Jim,
The DFG is providing two operative definitions of a legal hoop net, lies flat on the ocean floor as well as the new style hoop net that has thein order to accommodate the gear configurations that are currently in use by the public. The definitions will include the traditional style hoop net that second smaller ring that is held above the ocean floor. Is it legal to modify these two types of nets? I can't find any info were it says you can or can't. |
|
|

|
|
|
#138 | |
|
.......
Join Date: Jan 2009
Posts: 1,509
|
Quote:
Any time you do something like this you have to look at the regs. I made my nets before they made the new regs, but I have been told that these nets of mine fall under the current guidelines for cone nets. I kinda lucked out because they are my favorites and my most successful design I actually have several other designs that I imagine are now no longer legal, as they were flat nets with additional rings that pull up in the shape of cones. It's my understanding that anyone can make thier own nets or modify nets, but any nets you actually put in the water must conform to the size and configuration guidelines put out by the DFG. The only issue I could of had with these nets is the size and height of the top ring, since my top ring was the same size as a Danielson cone in diameter, and around the same the same height as the top ring of the Promar eclipse nets. my nets are within the legal dimensions the DFG created around both those production nets. Bottom line though is you can make your own hoopnets. Jim Last edited by Fiskadoro; 03-29-2011 at 02:43 PM. |
|
|
|

|
|
|
#139 |
|
Senior Member
Join Date: Feb 2009
Location: SAN DIEGO
Posts: 1,086
|
The new promar eclipse was approved by the DFG becase its spec's were
similar to the old traditional hoop. Have you cheked with the DFG about modifcation/configuations/mechanisms of your new hoop net? Might be worth checking just to be sure. http://www.promarnets.com/Media/Arti...-10/P1-P14.pdf |
|
|

|
|
|
#140 |
|
Senior Member
Join Date: Jun 2008
Posts: 552
|
Don't forget, that you don't want to violate the new soak limit!
  Nice nets Jim! |
|
|

|
 |
| Tags |
| kayak fishing inovations, kayak rigging ideas |
|
|