
 |
|
|||||||
| Home | Forum | Online Store | Information | LJ Webcam | Gallery | Register | FAQ | Community | Calendar | Today's Posts | Search |
 |
|
|
Thread Tools | Display Modes |
|
|
#621 |
|
Newby
Join Date: Jan 2012
Location: Menifee, CA
Posts: 6
 |
Fish Bag!
 P.S. cooler in the pic is Mega-size with a 39" I.D. |
|
|

|
|
|
#622 | |
|
Senior Member
Join Date: Apr 2012
Location: Carlsbad Ca.
Posts: 1,206
|
Quote:
Good job and thanks for sharing.
__________________
[SIGPIC] |
|
|
|

|
|
|
#623 |
|
Senior Member
Join Date: Sep 2011
Location: San Diego
Posts: 901
|
Sabiki Bait Cage
Cost: Free with a rock and I guess the forfeit of the CRV.
|
|
|

|
|
|
#624 |
|
kayak fishing socal
Join Date: Nov 2013
Location: Southern California / Whittier
Posts: 438
|
Okay so I totally failed miserably at trying to make a rod pod Center Hach tray anybody ever make one or bought one from somewhere here's what I had, did not hold up to my standards at all I guess I need to put more time it
   sent from my thumbs on my G4 Last edited by yak-fishing-socal; 09-02-2015 at 11:36 AM. |
|
|

|
|
|
#625 | |
|
Manic for Life
Join Date: May 2015
Location: San Diego
Posts: 839
|
Quote:

__________________
Another ho-hum day in Paradise |
|
|
|

|
|
|
#626 |
|
Senior Member
Join Date: Feb 2012
Location: Oceanside
Posts: 112
|
Nice Idea, try using that as a mold and wrap it with fiberglass.
|
|
|

|
|
|
#627 |
|
kayak fishing socal
Join Date: Nov 2013
Location: Southern California / Whittier
Posts: 438
|
|
|
|

|
|
|
#628 |
|
Xcoastie
Join Date: Jun 2013
Location: Westminster
Posts: 285
|
Just a thought but this kinda looks like a garden flower pot. Next time your at homedepot might want to take a look. Could be way off but that idea popped into my head when I saw the shape.
|
|
|

|
|
|
#629 |
|
kayak fishing socal
Join Date: Nov 2013
Location: Southern California / Whittier
Posts: 438
|
Lol it is that's what I hacked up
sent from my thumbs on my G4 |
|
|

|
|
|
#630 |
|
Xcoastie
Join Date: Jun 2013
Location: Westminster
Posts: 285
|
Ahh yes looks familiar. They had 24" and 36" models. Was the 24 to big?
|
|
|

|
|
|
#631 |
|
Catch and Release(#2)
Join Date: Oct 2013
Location: Oceanside
Posts: 77
|
Peddle system with rudder hands free turn around/ follow the fish
__________________
Philippians 4:13 I can do all things through Christ who strengthens me  Caddiyak PA14 |
|
|

|
|
|
#632 |
|
Senior Member
Join Date: Jul 2006
Location: Fullerton
Posts: 1,359
|
|
|
|

|
|
|
#633 |
|
kayak fishing socal
Join Date: Nov 2013
Location: Southern California / Whittier
Posts: 438
|
|
|
|

|
|
|
#634 |
|
Senior Member
Join Date: Apr 2015
Posts: 303
|
I added some rail padding that is more commonly used for Baseball Fields to my trailer extender
Flat padding $ 9.95 per foot - The "t" bar is about 3ft across Comes in Flat pad or Round pad at 2-1/2 in diameter The flat pad is what I currently have on it. Just need to tie it down with zip ties . The round pad is what I have in my hands The round padding is $12 per foot Graphics are extra 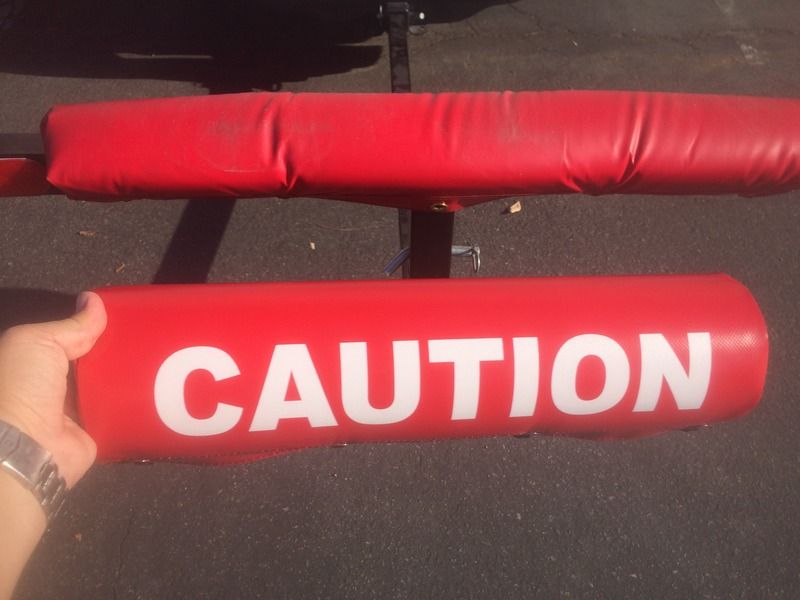 I will be bringing these to the JAL event if interested Mike |
|
|

|
|
|
#635 |
|
Senior Member
Join Date: Sep 2010
Location: South OC
Posts: 1,606
|
Kayak Cart renovation
So had real miserable cart wheels. the kayak would slip off, I felt like an ox plowing a field pulling across the sand.
This was my second set of wheels of this type. Turns out I found a "never flat" all purpose wheel at home depot. Have to buy a set of 4 approx $60. the wheels have 2 bearings in each and are 5/8s. so a 5/8 lag bolt on each side almost exactly fits perfect into the old axle. With a bit of electric tape at a couple of spots for a super snug fit, I hammered them into the old axle and they are snug and spin really well. I may try to drill a tap screw or something. we'll see. A few outings so far. a world of difference vs. what I had. Let's see if it holds up longer than a year. |
|
|

|
|
|
#636 |
|
Junior
Join Date: Oct 2015
Posts: 26
|
IRON BUCKET!
Hey guys. I saw a guy with one of these but i couldn't find any DIY's so i decided to make one:
Need a place to store your irons?     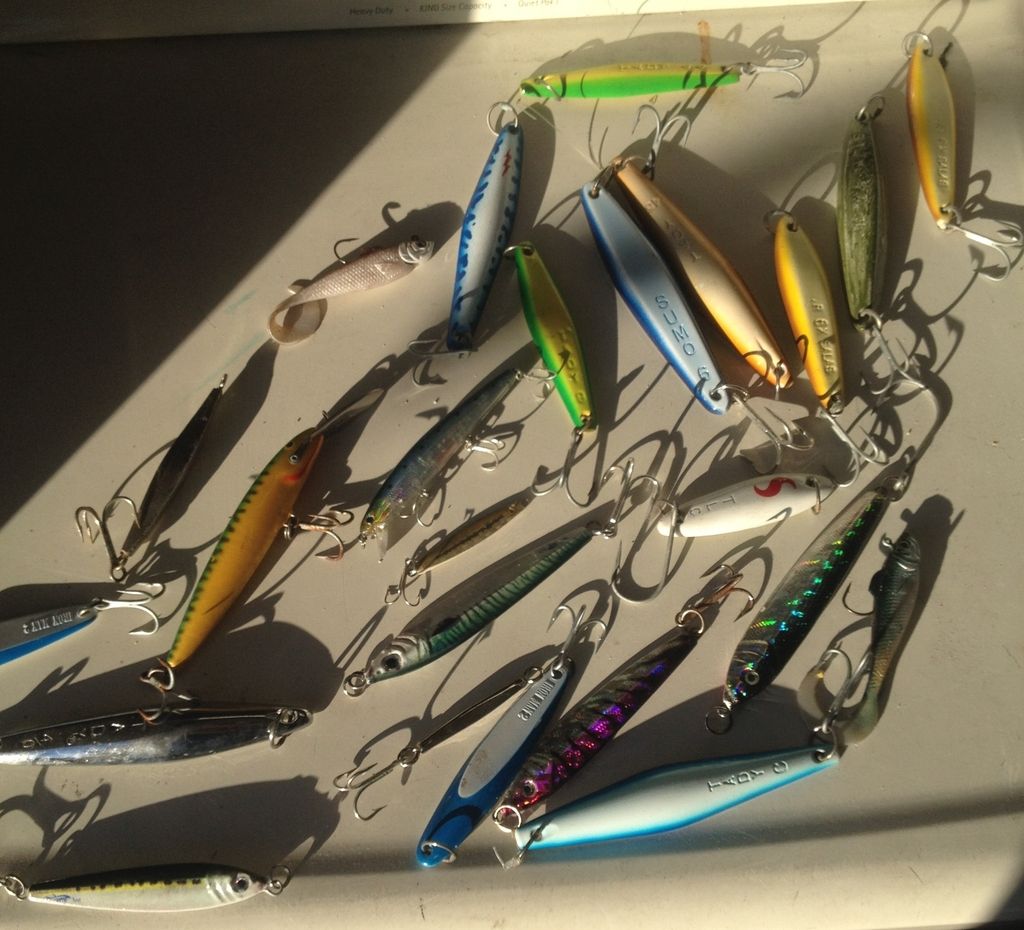 What you need: Bucket Bucket Lid Utility Knife Dremel tool Drill Bit Drill (You can use dremel tool as well) IRONS! Cut the inner circle off and the outer lip off with the utility knife! 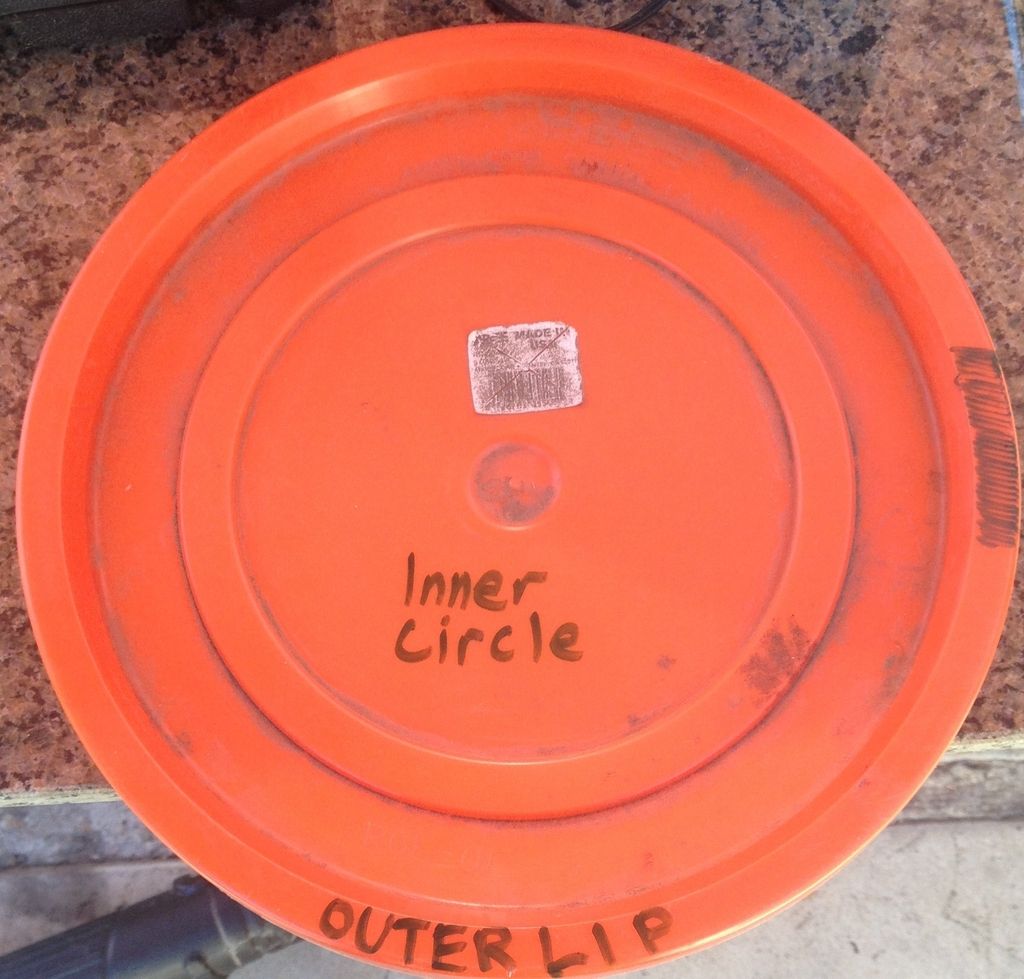 The outer lip wraps around the outside of the bucket (this is the part that has to go) and the inner lip stays inside the bucket (do not cut this off) 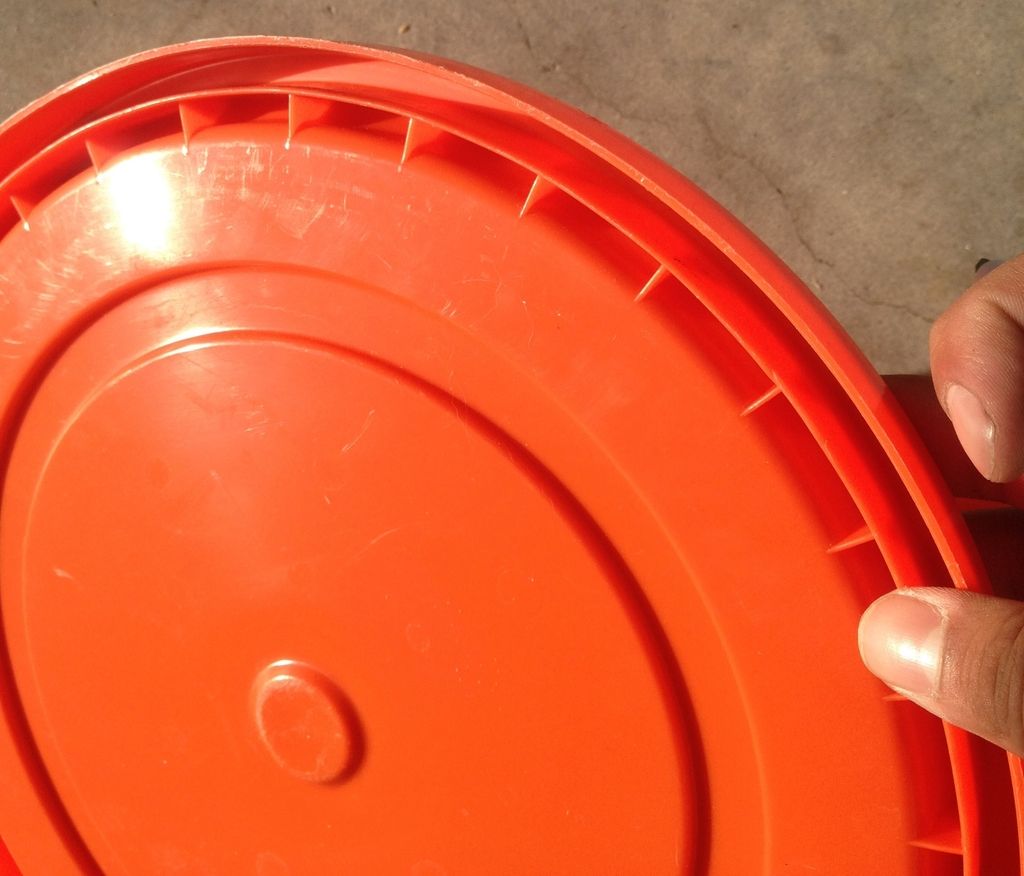 Smooth out lid with dremel 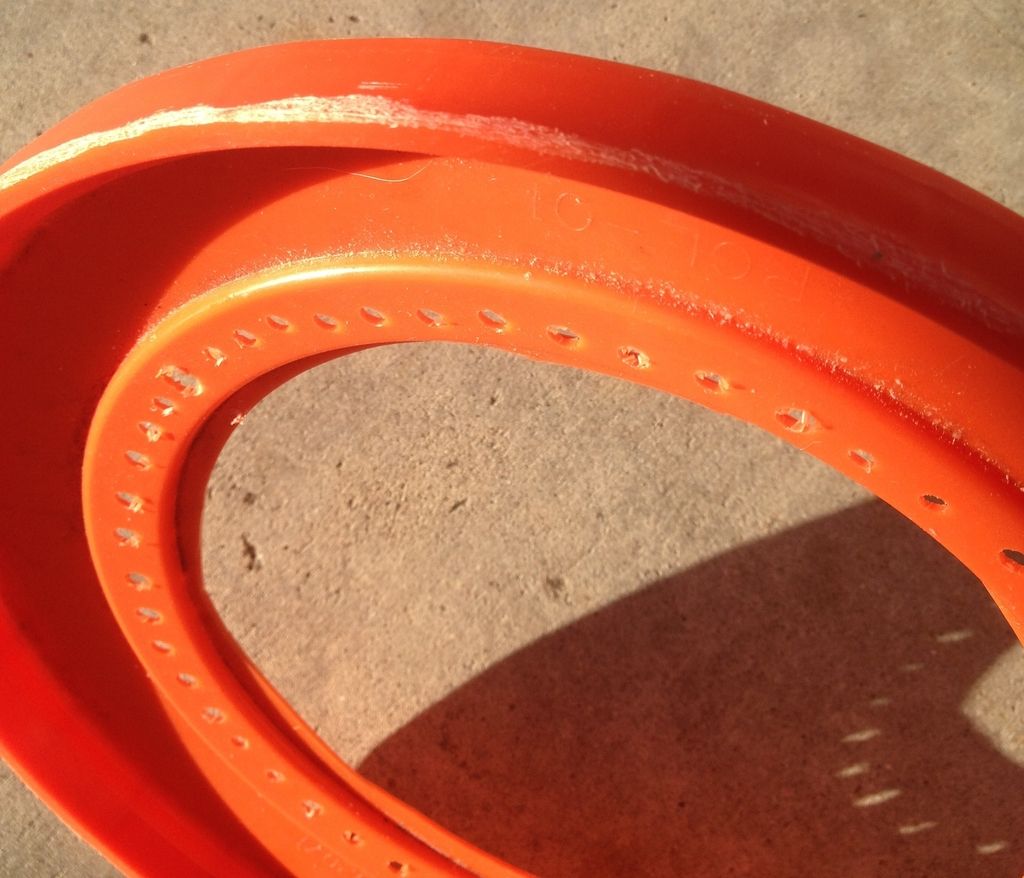 Slide lid down halfway and drill out holes 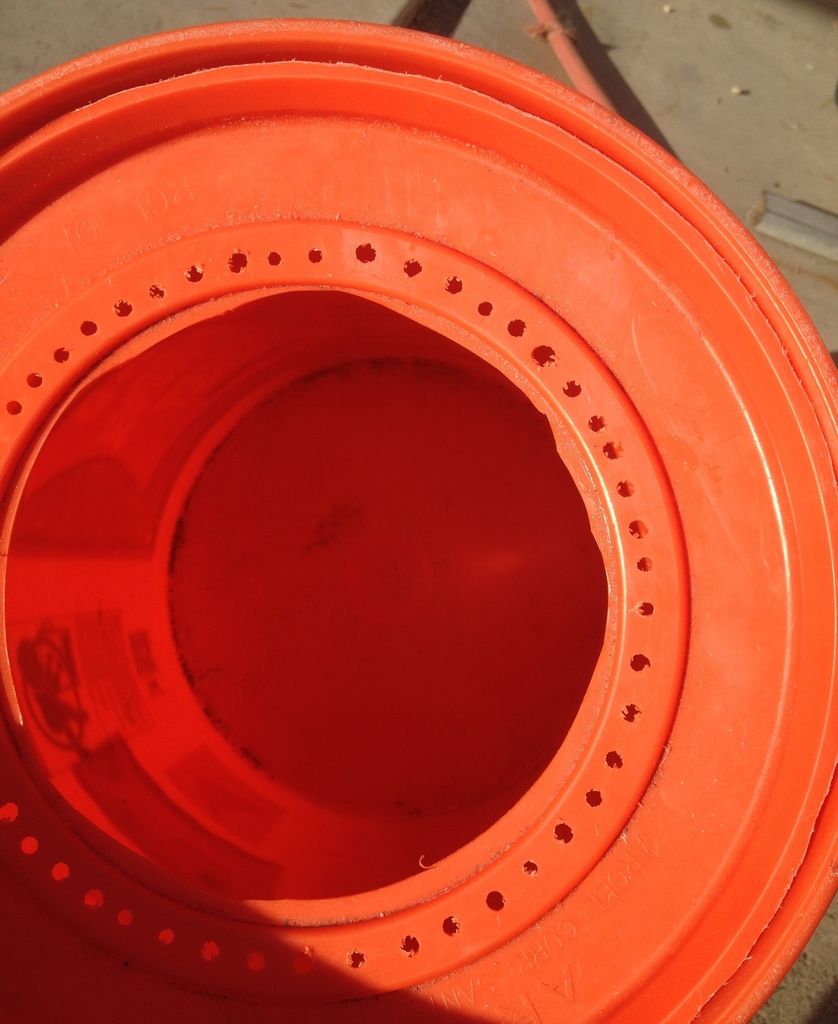 Now add your irons in and voila! You have a safe way of transporting and storing your irons. The lid sits tightly inside and does not require glue; you can remove the lid and use the bucket when needed. 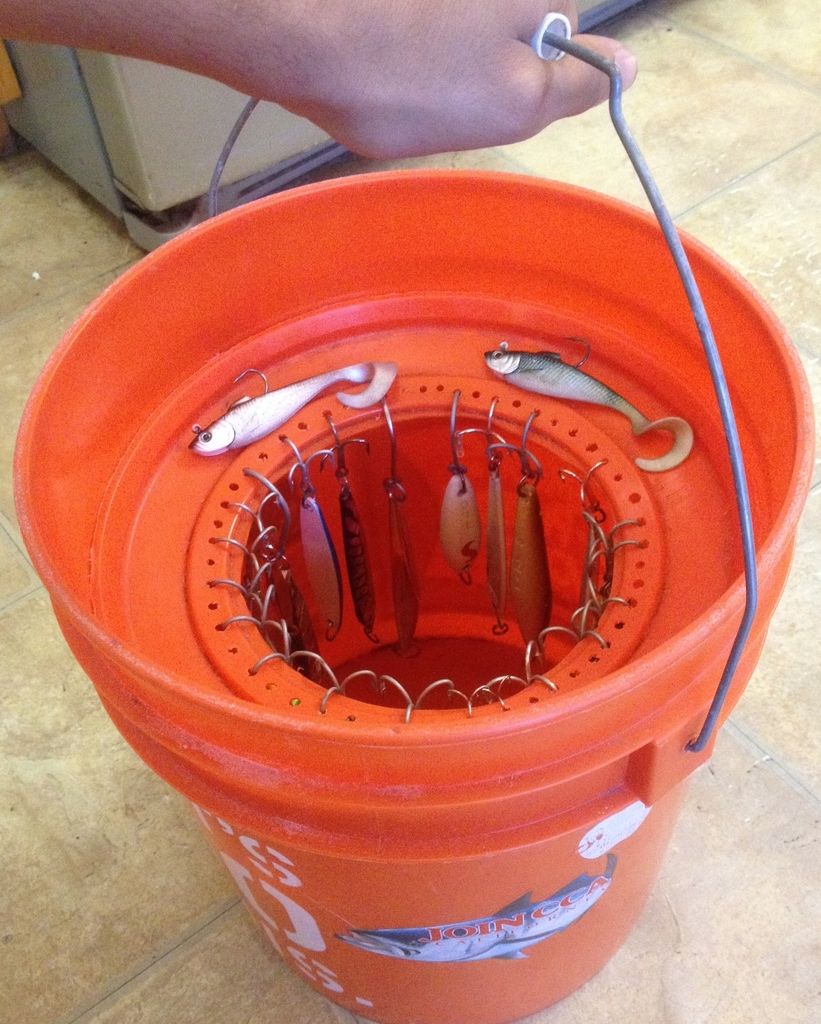 I drilled my holes out with my dremel tool so it came out looking pretty rough; I also did not bother smoothing out the inner circle. If you want yours looking better than mine, use a drill for the holes and smooth out the inner circle with dremel Last edited by Deez Knots!; 10-29-2015 at 11:28 AM. |
|
|

|
|
|
#637 |
|
Member
Join Date: Dec 2011
Location: Tehachapi
Posts: 81
|
Catayackamaran..uh, yeah.
I did this to get my wife out with me. She does not have the confidence in her vision and balance to go it alone. It sails pretty well, surprisingly well. I have not had another person on it yet, and don't know how it will act, but expect it to be fine. No Hobies were harmed in this mod. Everything is removable. I know, I'm a Kook.
|
|
|

|
|
|
#638 |
|
Member
Join Date: May 2013
Location: San Diego - North County
Posts: 82
|
HFT cart wheels
I broke the plastic Hobie wheels bouncing my fully loaded yak off a curb on the way back to the truck... I wanted something, wider, stronger and less expensive than the nice fat Hobie sand wheels.
HFT had a sale: $5 each. Axle cost $9. Bolts, washers, nuts, cotter pins, $5. total rated capacity for this should be over 600 lbs...more than needed for a 180 lb PA14! The hubs on these bolt in, so I replaced the bolts with longer ones to create dualies and threaded the end of the axle for a nut with a cotter pin to keep it from walking. Last edited by Hammerhead_77; 11-16-2015 at 01:53 PM. |
|
|

|
|
|
#639 | |
|
Member
Join Date: Jun 2011
Posts: 49
|
Quote:
Kind of confusing, but I actually made my own bait tank like this. you can DM me or call if you need pics. 808-722-4377 |
|
|
|

|
|
|
#640 |
|
Member
Join Date: Nov 2015
Location: HB
Posts: 33
|
Easy Rod Leashes
Here is my interpretation of a simple and cheap rod leash.
It needs to be simple, corrosion resistant, strong, and inexpensive. Everything but the bungee was purchased at Home Depot. Here is what you will need: 3/16" bungee cord ($9.50/50 ft. on eBay) paracord ($4) plastic snap buckles ($0.99 for two pairs) plastic S-biners ($0.99/ea.) lighter tape measure 1/16" SS wire 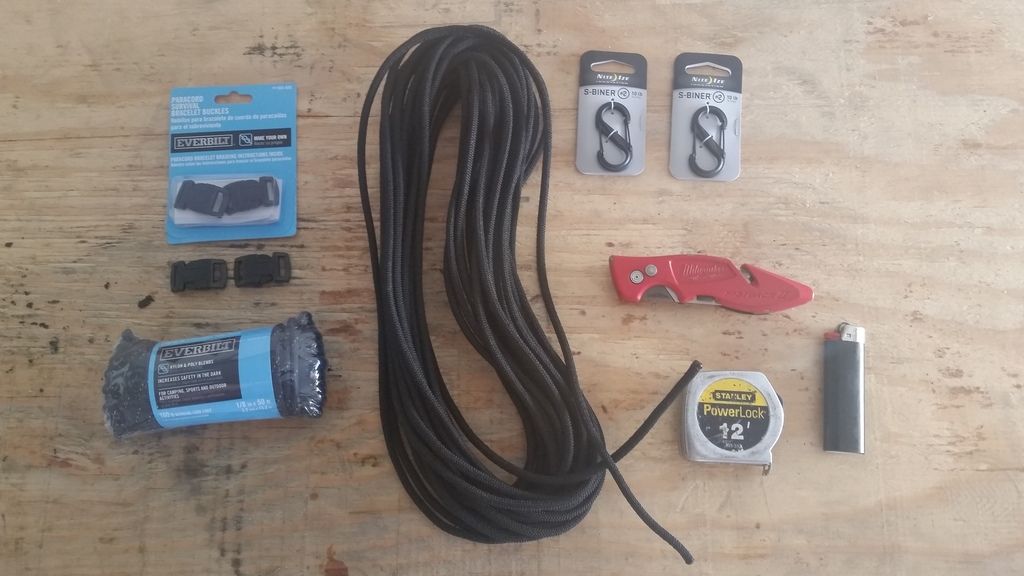 I began by making a lanyard, which has a female snap buckle on one end, and a loop on the other. The length of the loop can be adjusted to fit your needs. The plastic snap buckles came with instructions on how to make the lanyard. It's about as easy as tying your shoes. 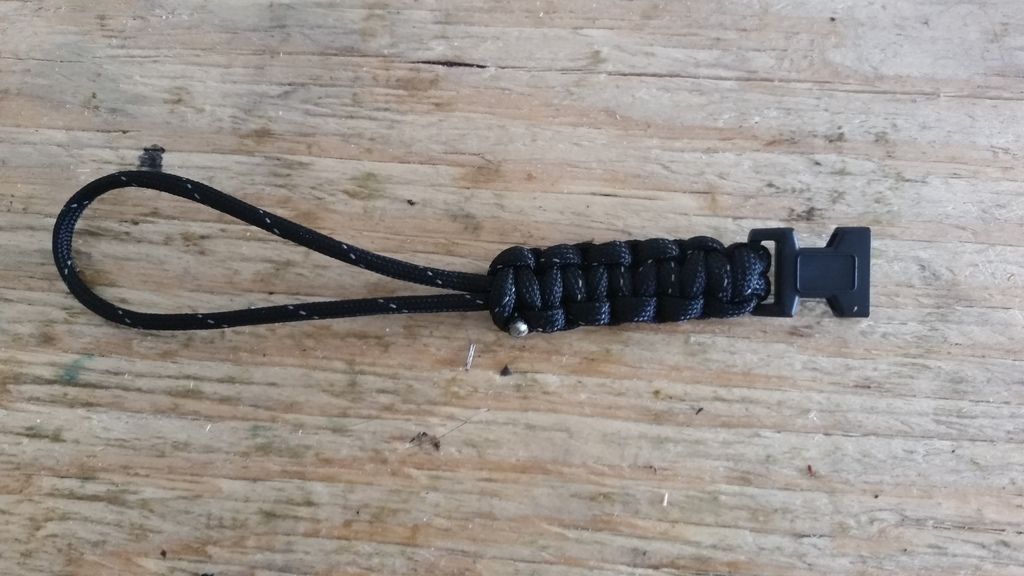 I made up some DIY stainless steel hog rings out of 1/16" SS wire. 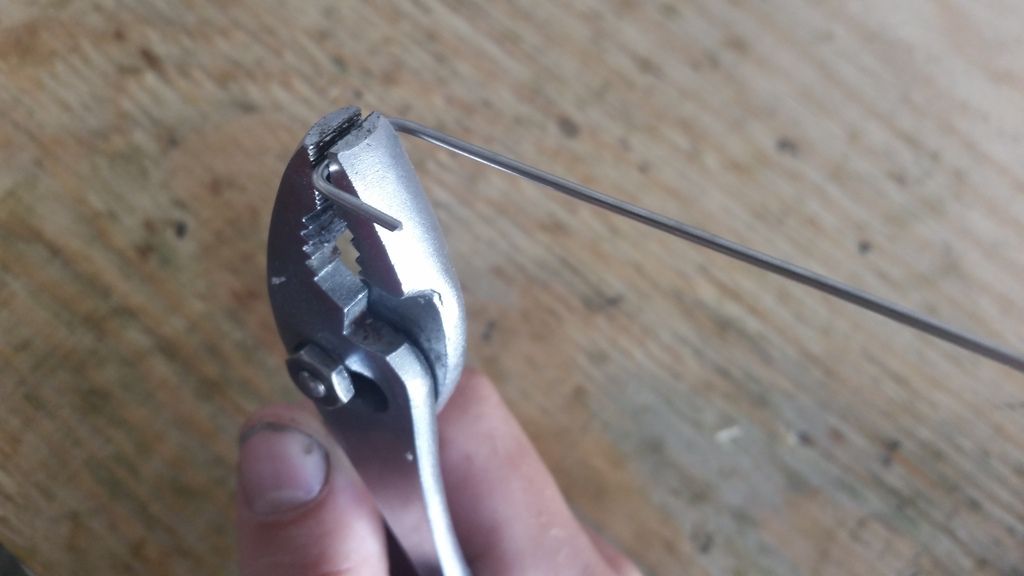 After approximating my shock cord length, I attached a S-biner to one end, and the male snap buckle to the other. Then compress the SS hog rings around the bungee. 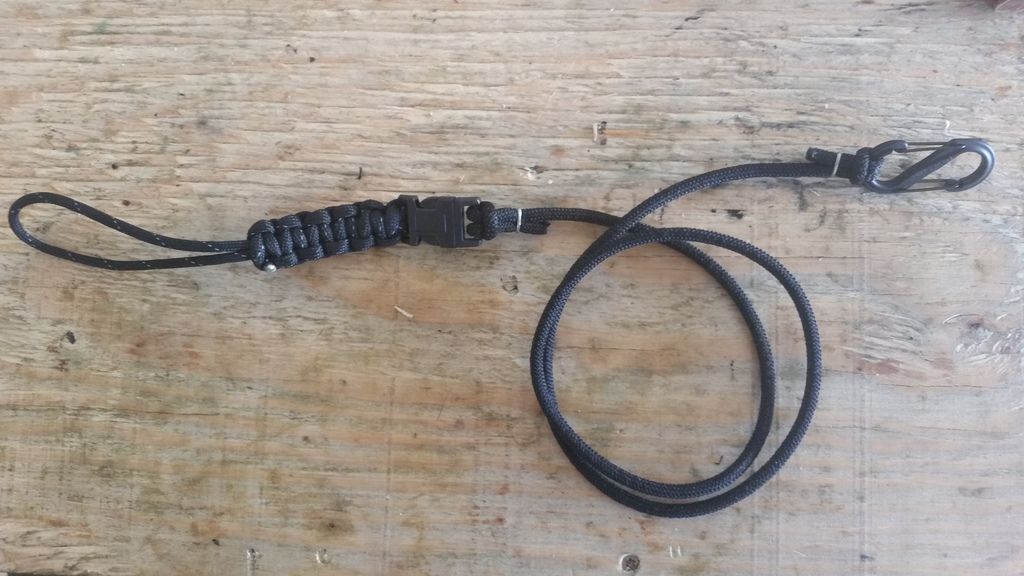 That's it! The loop end of the lanyard can be modified to attach to your particular rod/reel. It can be easily looped through reel clamps that have a ring. Velcro could be ran through the lanyard loop for attaching the leash to the rod. |
|
|

|
 |
| Tags |
| kayak fishing inovations, kayak rigging ideas |
|
|