
 |
|
|||||||
| Home | Forum | Online Store | Information | LJ Webcam | Gallery | Register | FAQ | Community | Calendar | Today's Posts | Search |
 |
|
|
Thread Tools | Display Modes |
|
|
#221 |
|
Senior Member
Join Date: Nov 2011
Location: Laguna Hills, Ca
Posts: 309
|
Bass Pro seat
materials used- Bass Pro Folding boat seat-24.99 Bass Pro Boat seat swivel- 9.99 Wise Quick Connect Boat seat mount 20.99 screws/bolt/washers- like $15 (had to go back and get longer bolts) scrap wood tube of Marine Goop Screws/bolts/washers were 1/4 in by 5 in X 4 1/4 in by 3 in X 4 1/4 in bolts X 8 washers X 24 Ok now to how it all went together- I cut the scrap wood to fit the match the Wise Quick connect. Then drilled the holes to mount the quick connect to the wood. I used the wood with holes drilled as a guide and drilled the holes into the kayak. once this was done I placed the wood block and Quick connect together and used over 3/4 of the Marine Goop on the bottom of the wood and placed the weather stripping around the edges of the wood. then bolted it all in to where the seat would go. On the top of the Wise quick connect I had to unscrew the top lip and place washers under the piece of metal to allow the base for the seat to slip in. I drilled out the holes in the seat to connect the seat to the swivel base to allow for a better hold (the screws that come with the seat seem weak to me) For the Stealth 14 because of the bait tank hatch I had to cut out a little bit of the front center of the seat to beable to open the hatch. Then put it all together and here is the end result. I used a Drimal tool to sand down all the edges that were still touching the kayak and causing friction.(pretty much just the back of the folding seat and the back corners on the bottom. I took it out to Dana Point last weekend to test it out. The seat didn'e really change the center of Gravity. It felt the same as before I installed the seat as far as stability goes. I caught a 18 lb Halibut and never felt that I was going to tip over. Another good thing i found is by Installing the seat this way it creates a space below the seat for more storage. My Nalgene bottle will fit under the seat perfectly. Hope this helps those that had questions and feel free to ask all the questions you want. Next project is a trolling motor and I WILL be asking lots of Questions. My Goal is to make this stealth 14 better than a Pro Angler!! 
|
|
|

|
|
|
#222 |
|
Team Keine Zugehörigkeit
Join Date: Nov 2010
Location: Way out there
Posts: 2,854
|
Nice work on the seat, did you use any type of sealer on the wood like varnish or Thompsons?
__________________
 Não alimente os trolls------------Don't feed the trolls---------------インタネット荒らしを無視しろ 
|
|
|

|
|
|
#223 |
|
Senior Member
Join Date: Nov 2011
Location: Laguna Hills, Ca
Posts: 309
|
|
|
|

|
|
|
#224 |
|
Senior Member
Join Date: Sep 2011
Posts: 598
|
So I broke a pole at DP kelp bed. Saw a innovation someone did so I deiced to follow.
and... working on a new bait tank. |
|
|

|
|
|
#225 |
|
Senior Member
Join Date: Nov 2010
Location: IE
Posts: 171
|
|
|
|

|
|
|
#226 |
|
Lucky Fisher
Join Date: Feb 2012
Location: too far inland
Posts: 366
|
I'd stick that inside the pole with some heavy duty epoxy. Would one think MG would work?
__________________

|
|
|

|
|
|
#227 |
|
Senior Member
Join Date: Nov 2010
Location: IE
Posts: 171
|
btw, is the hook's angle too circular; ie pointing towards the shaft a bit much?
|
|
|

|
|
|
#228 | |
|
Senior Member
Join Date: Mar 2010
Location: Santee
Posts: 904
|
Quote:
I tried to minimize how far it sticks out, but it still does about 1/3" or so. Seems ok when dragging across the sand since the bow is lifted up, and when resting on the sand the shape of the hull prevents any pressure up against the transducer. |
|
|
|

|
|
|
#229 |
|
Senior Member
Join Date: Jun 2010
Location: Alhambra
Posts: 506
|
inova microlight LED Wand
it is starting to get to that time of year where lots of us go out fishing late at night or o'dark early morning. trying to keep myself safe and more visible i thought that i would add a flag to my ride.
i went to home depot and found a fiberglass stick about 5/16 in size, that had a reflector attached to the top, it's about three feet in length. i think the original use for this was to line them along your drive way so that it would help illuminate the path for you. so i added some reflective tape to the pole and also added a flag, (thanks george for that vitamin water bag). the next thing i wanted to do is illuminate the pole using some type of light. went to bass pro shop, but i am sure other stores have this type of light. (just wanted to use my gift cert that i got for my birthday.) roamed around the store looking at all the different type of lights that were available. finally found this LED Wand. i liked it because it is waterproof and also submersible. also the light is able to be used with a high beam, low beam and also strobe setting. i was a bit concerned that the light would turn itself off after 30 mins like that other types of wand lights out there but it has not so far. what i did to attach this to my flag pole was to use some clips that i had gotten when i had purchased a light rope. the light rope for those who aren't familiar are the outdoor lights that you can buy at the home gardening section at your local target or walmart stores. i am not sure if they come with all the light ropes. the one that i had gotten was designed to hang from the outdoor umbrella so that's why it had these clips. i attached the clips to the wand and used goop to glue it. after that just snapped the other side to the flag pole and it worked perfectly. i may add a clip to the wand and then to the pole just in case it gets knocked off. hope that this is informative and useful to others. keep safe out there and good hunting.  
|
|
|

|
|
|
#230 |
|
Senior Member
Join Date: Jun 2010
Location: Under a bridge
Posts: 2,169
|
Nice Tim.
Now you just have to go fishing! Those little clips deteriorate very quickly in sun exposure and become brittle after a season or two, I had some in my back yard. See out there this weekend. |
|
|

|
|
|
#231 |
|
Senior Member
Join Date: Jun 2010
Location: Alhambra
Posts: 506
|
thanks matt. but for me i probably won't have the problem of brittle clips. i really don't get out very often and when i do, i would not be bring this out with me unless it is a night or early morning launch. so with that it should be okay regards to the uv rays.
Last edited by tagyak; 04-24-2012 at 04:38 PM. |
|
|

|
|
|
#232 |
|
Junior
Join Date: Mar 2012
Posts: 28
|
portable fish finder
I am working on this right now. I could not upload the image but here is the web link.
I made this portable fish finder to be mounted on and Scotty base as soon as I figure out how to make the folding arms for the transducer I will post more pictures. I have it running on a 12v 7 amp hour battery. The unit turns on and runs have not tested it the ocean yet. I will this sat in NPH. http://img851.imageshack.us/i/imagebdp.jpg/ Papa drew |
|
|

|
|
|
#233 |
|
Senior Member
Join Date: Apr 2010
Posts: 6,856
|
Bungee Cord/Leash keeper Thingy
  
__________________
 www.facebook.com/Teamsewer |
|
|

|
|
|
#234 |
|
Senior Member
Join Date: Sep 2010
Location: South OC
Posts: 1,606
|
What to do with an old sherwood. . .
So i had a few of these sticks laying around. I bought the gaff hook at the jig stop in dana point. The gaff has a nail/point at the end of the shaft to "hammer into" in this case the stick. So a couple of whacks to drive the point into the wood. . . it doesn't slide up and down. Added the rope wrap, sideways now strong. I suppose I can use a lacquer for added protection and maybe strength, but it's on solid.
All the chatter on the home-made "ghetto" gaff got me to thinking I needed more tests. Bring on the 50lb trash cans, this baby works and lasts. I've had is since 2009 when I started. I think it floats too which is why I still have it. 
|
|
|

|
|
|
#235 |
|
Member
Join Date: May 2012
Location: Lakeside
Posts: 97
|
a few of my ideas
I Picked up a self contained (batteries inside, no wires to screw with and no load on the electrical system
 CHEAP! Waterproof 360 degree boat light at Walmart. The pole it came with was too short so I took the screw out, broke out my drill and mounted it on a tent pole I had laying around. It's higher than my head and fits snugly in the mast post on my PA and it puts out a decent ammount of light for those dark launches and times on the water. It was much cheaper than the purpose built lights for sale at the stealerships and it is clean looking on the boat. CHEAP! Waterproof 360 degree boat light at Walmart. The pole it came with was too short so I took the screw out, broke out my drill and mounted it on a tent pole I had laying around. It's higher than my head and fits snugly in the mast post on my PA and it puts out a decent ammount of light for those dark launches and times on the water. It was much cheaper than the purpose built lights for sale at the stealerships and it is clean looking on the boat.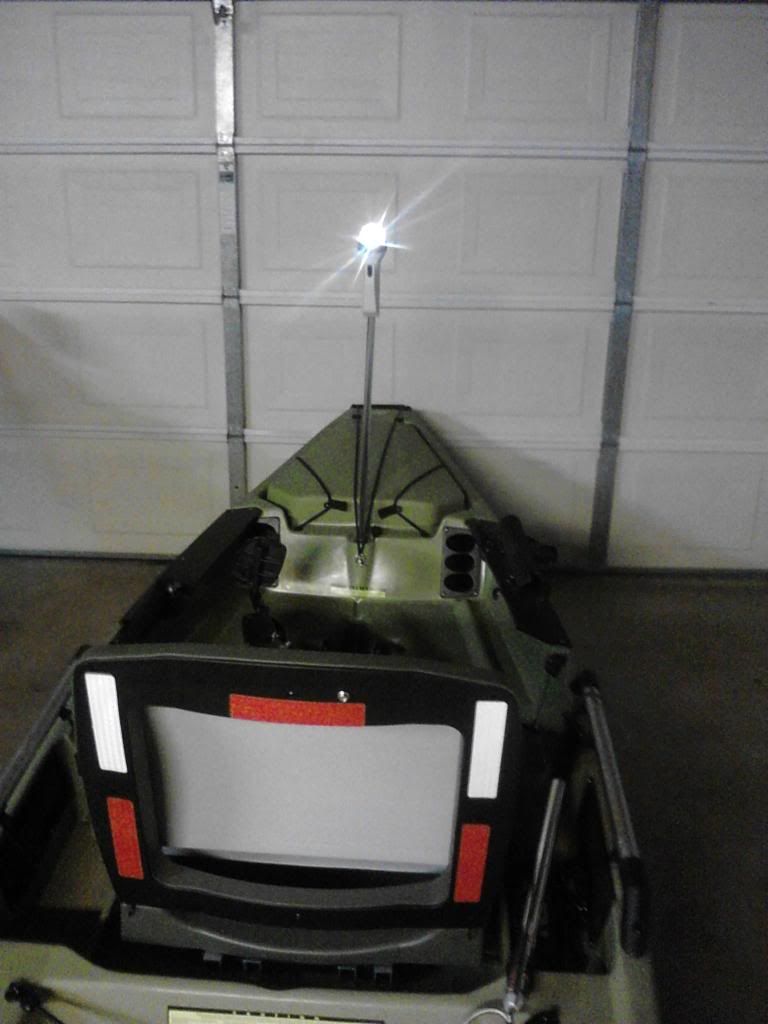 Here's another home made idea I put together from stuff I had laying around, my Rod leashes...they work great! 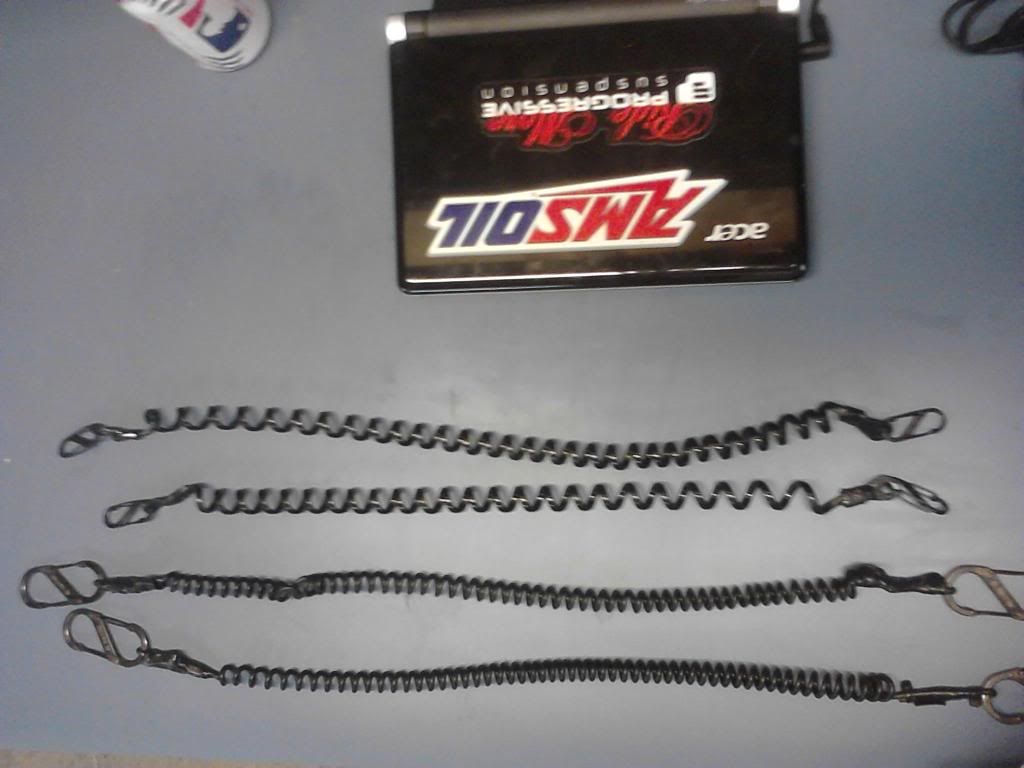 here's my modified Sea Striker Gaff, drilled a hole in the grommet and attatched a Bungee leash then used super glue to make sure it would not pop out. 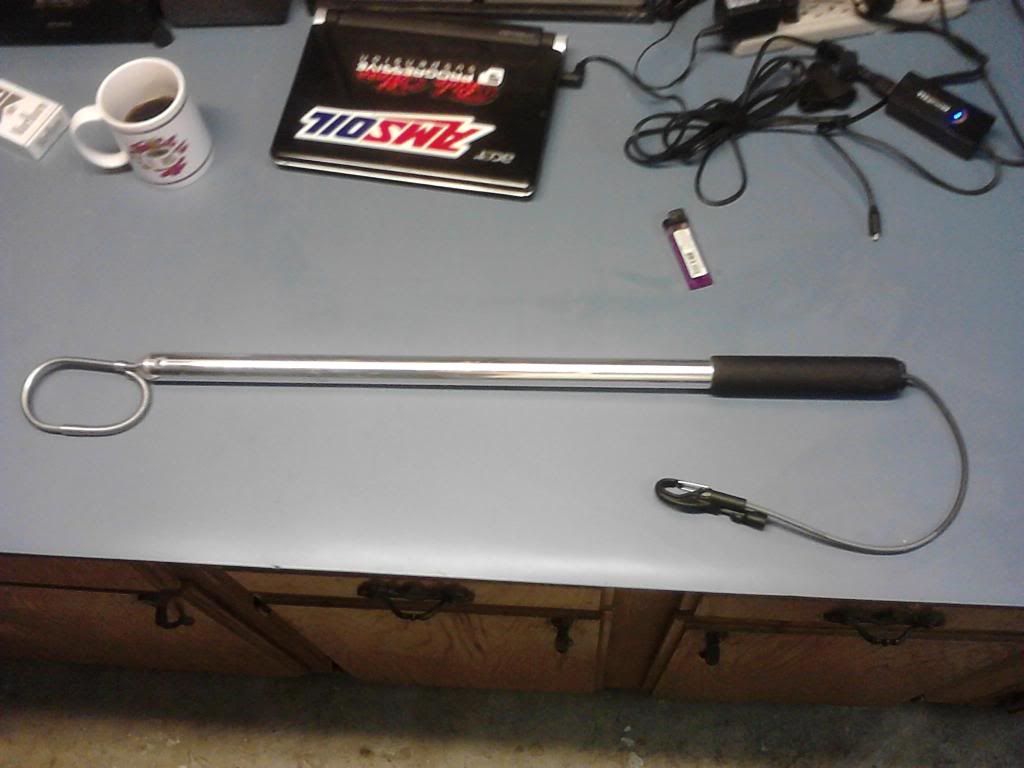 This was a great add on to my Tarpon 160i....these Stainless Steel Shackles are available at Home Depot for less than 1/2 of what you would pay for them at West Marine or any boat / Kayak store. They Make strapping stuff down easier with conventional bungees than the super small cleats that most yaks have installed. 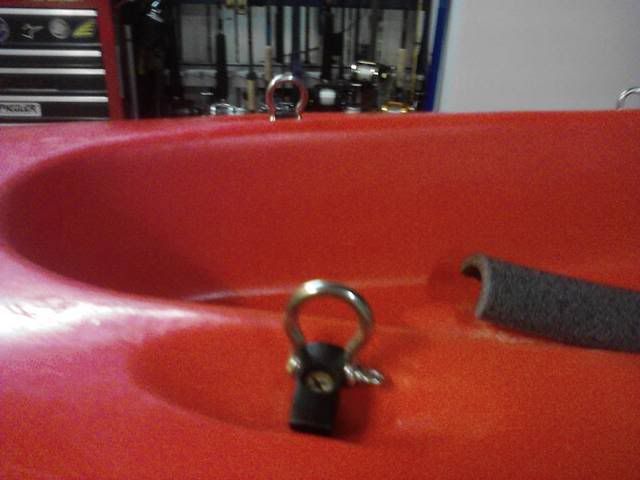
|
|
|

|
|
|
#236 |
|
CEO of Team Roby
Join Date: Sep 2010
Posts: 905
|
I got some advice from a friend I wanted to pass on. A light up front will actually work against you at night. It's better to place the light behind you if possible....
Cool mods by the way.... 
|
|
|

|
|
|
#237 |
|
Member
Join Date: May 2012
Location: Lakeside
Posts: 97
|
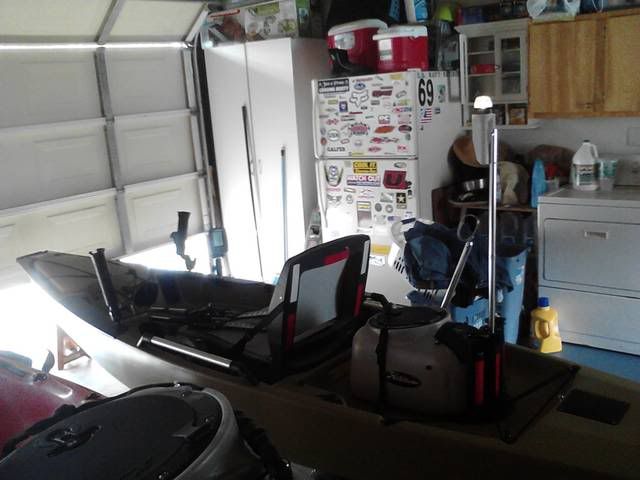
Very Good Point! So I did a Quick & Easy Fix. I took a soft large tapered red scupper plug and drilled a 3/4" hole through the center of it, cut it in half and slid the two pieces up the bottom of the light pole and spaced them out. It seats vey snugly in the center rod holder on my bait tank (I can even lift the hole thing by grabbing the pole)it is not going to slide out if I roll over. It pops right out too with a little tugging. I'm not too worried about losing a rod holder at all since it is a PA & I have more than enough places to put rods. Always Better to be safe than sorry fer sure.
|
|
|

|
|
|
#238 |
|
Senior Member
Join Date: Sep 2011
Posts: 598
|
another DIY bait tank.
I went back to my smaller tank cause the other one seem heavy. Went to OEX Oceanside Dive and Kayak to get the pump. Now all I have to do is wire up the battery box. Trying to test this out tomorrow. Last edited by echo1er; 06-03-2012 at 01:10 AM. |
|
|

|
|
|
#239 | |
|
Senior Member
Join Date: Apr 2010
Posts: 6,856
|
Quote:
The overflow looks way to low, you might want to put an elbow on it and raise it by a few inches.
__________________
 www.facebook.com/Teamsewer |
|
|
|

|
|
|
#240 | |
|
Olivenhain Bob
Join Date: May 2008
Location: Olivenhain, CA
Posts: 1,121
|
Quote:
Bob |
|
|
|

|
 |
| Tags |
| kayak fishing inovations, kayak rigging ideas |
|
|