
 |
|
|
#21 |
|
Senior Member
Join Date: Nov 2008
Location: San Diego
Posts: 134
|
Ok.. you put mine to shame!
Is this the one? Cant seem to find one for $20.. http://www.petsmart.com/product/inde...ductId=2811537 |
|
|

|
|
|
#22 |
|
Senior Member
Join Date: Mar 2009
Posts: 2,384
|
That is the same container, mine just sits on what is the back side in the picture. Might have to look in store for the sale price. $20 is a great price for them.
|
|
|

|
|
|
#23 |
|
.......
Join Date: Jan 2009
Posts: 1,509
|
Here's what I made out of a brute trash can, and a conical trash can lid
   Works great! Can't complain. I especially like the cone shape lid as it keeps bait in but is easier to drop bait into. Bait barges love the tank as it's super easy to scoop bait into for the same reason. That shows the original pump setup but now I've gone to a in the hull..     Completely trouble free since I put it in.. works for me.. Jim |
|
|

|
|
|
#24 |
|
Senior Member
Join Date: Nov 2008
Location: Whittier
Posts: 126
|
|
|
|

|
|
|
#25 |
|
Member
Join Date: Aug 2008
Location: LJ
Posts: 97
|
Hobie Power, No peddles needed
Adam post some pics of your's, The hobie tank will work in most kayaks! I have a tarpon 160I, it has a small tankwell but the hobie tank looks like it was made for it!! My tank is feed by a thru hull pump, I pluged the intake hole that the attwood pump fits in and mounted the pump inside the yak. I use a 12volt system, I use an airator style nossle on the intake that is adjustable for the flow.
    Here is a pic of my old tank, still a great tank but not as clean as the hobie tank.     I've made a few bait tanks, I've only been kayak fishing for just over a year and I think I've made a new tank every month!! I've finally came up with a setup that will be around for a while. I can't take the credit for the hobie tank mod, Adam modified his first, after seeing it I had to have one. The hobie container has it all, low profile, a great hatch, and has places already for rod holders, so if you think the hobie bait tank is just for hobies think again. You can buy the hobie bait tank parts seperately. |
|
|

|
|
|
#26 |
|
Crazy Deaf Cuban Redneck
Join Date: Dec 2009
Location: Descanso, CA
Posts: 158
|
Thanks!
Thank you everyone for all your input and have decided to start making the bait tank today. I'm going with the pet tank with new rod holders, 6 volt battery, and some items from the old tank to the new one. I look forward to do the build and will show the finished tank with pictures.
|
|
|

|
|
|
#27 |
|
Banned
Join Date: Sep 2009
Posts: 117
|
Hook 1 has a decent write up on how to make your own bait tank:
http://kayakfishinggear.com/riggingy...k-how-tos.aspx |
|
|

|
|
|
#28 |
|
Senior Member
Join Date: Mar 2005
Posts: 116
|
I liked the idea of using the stackable vittles vault, but they were too big. Instead, I decided on the larger version of the OEX "ultimate" container. http://www.petguys.com/-769397142300.html
It is rated to hold 30 lbs compared to 15 lbs for the smaller one. At 14 x 14 x 13 tall, it fits perfectly in my Hobie Adventure. The larger size makes it suitable as a livewell or a dry box. 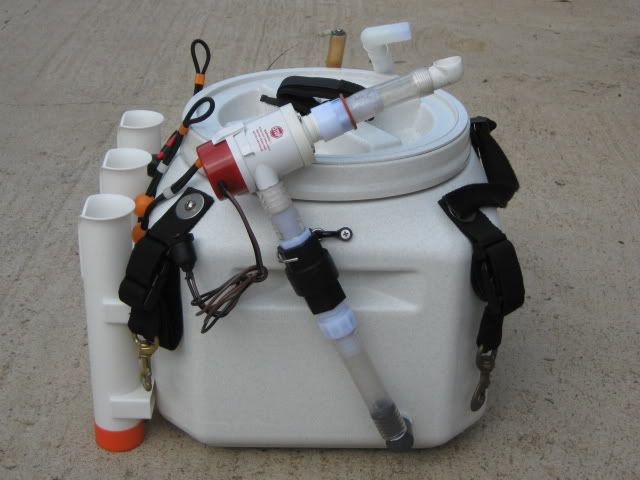 It is self-priming and will not drain when the power is shut off. The fitting attached to the pump was manufactured from a 1/2" pvc male threaded elbow. The pump is connected to a one-way valve (from OEX). To disconnect the pump assembly, a male/female hose connection was added. 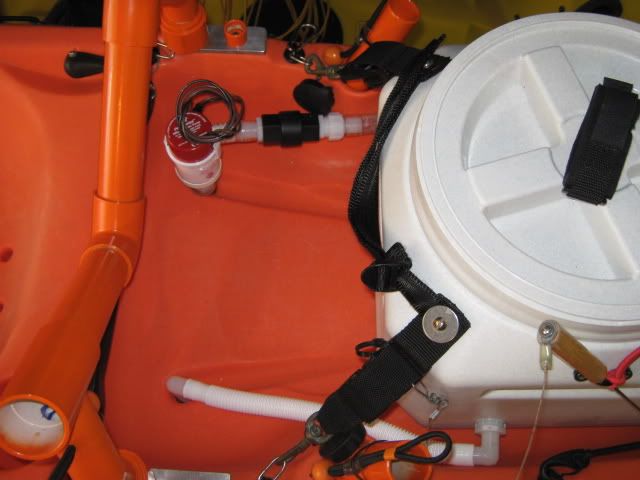    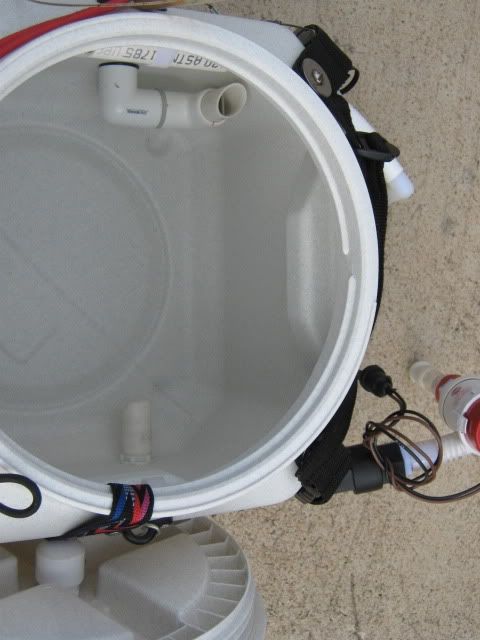 The intake is mounted low to oxygenate the bottom of the tank. The fitting was made from a 1/2" female threaded pvc elbow. The outflow is taken from the top.   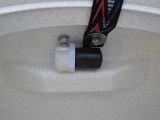 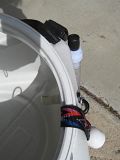 By angling the outflow tube downwards, the tank will drain itself. I may have to add a drain plug since there isn't enough suction to get all of the water out. The tank can be used as a livewell by changing the water level height tube. It is stored inside of the tank, using the eyelet bolt and a plastic conduit hanger. On the opposite side, I have storage for the hose-threaded plug which replaces the pump when the tank is used as a dry box. |
|
|

|
|
|
#29 | |
|
Rum Pirate
Join Date: Mar 2010
Location: Wilds of Mira Mesa
Posts: 388
|
Quote:
|
|
|
|

|
|
|
#30 |
|
Rum Pirate
Join Date: Mar 2010
Location: Wilds of Mira Mesa
Posts: 388
|
I like the way you painted your outriggers orange to match your boat....
|
|
|

|
|
|
#31 |
|
Senior Member
Join Date: Mar 2005
Posts: 116
|
|
|
|

|
|
|
#32 |
|
Rum Pirate
Join Date: Mar 2010
Location: Wilds of Mira Mesa
Posts: 388
|
FYI - Wet sanding them with 2000 will help the poly bond with the pvc pipe.
|
|
|

|
|
|
#33 |
|
Rum Pirate
Join Date: Mar 2010
Location: Wilds of Mira Mesa
Posts: 388
|
I'll know you you are if I see you on the water. That's fur sure.
|
|
|

|
|
|
#34 |
|
Crazy Deaf Cuban Redneck
Join Date: Dec 2009
Location: Descanso, CA
Posts: 158
|
I finally got around to do most of the stuffs for my first custom bait tank. First thing was I went to Petsmart to get the tank. Then went to West Marine to get tournament rod holders, and some hardwares. Finally, I stopped by the OEX at Kearny Mesa and got 6 volt battery set up, handle, and some eyelids. I bolted almost everything right there, removed some items from the old bucket bait tank, and I had OEX to do the rivets for me and had advices along the way. I slapped on the OEX sticker and some other sticker on it showing my first pride and joy for the new hotel for greenbacks! I'm thinking of going tomorrow to try it out. Here's the pictures as promised!
|
|
|

|
 |
| Thread Tools | |
| Display Modes | |
|
|